
TikTok LIVE Studio is TikTok’s own broadcasting tool for Windows and Mac, and it’s the most direct way to stream from a computer. No stream key juggling, no third-party setup, just log in and go live. This tutorial shows you how to use TikTok LIVE Studio, from download and setup to your first stream.
What is TikTok LIVE Studio?
LIVE Studio is a free desktop app made by TikTok for streaming to TikTok LIVE. Think of it as TikTok’s answer to OBS: you add your camera, your screen, or a game, arrange everything, and broadcast straight to your LIVE.
Because it’s built by TikTok, it talks to your account directly. You see your chat in the app, you set your stream title and topic there, and you don’t need to copy a stream key anywhere.
TikTok LIVE Studio requirements
The requirements are short. Two things decide whether LIVE Studio works for you:
- A Windows PC or a Mac. LIVE Studio started as a Windows app, but TikTok now ships macOS versions too, one for Apple Silicon and one for Intel Macs. On Windows you’ll want at least an Intel Core i3 9th Gen or Ryzen 5 3000 with 8 GB RAM, on Mac an M1 or a 2019-or-newer Intel machine. The minimum specs cover camera-only streams at 720p, gaming streams at 1080p need noticeably more.
- LIVE access on your TikTok account. The app streams to your LIVE, so your account needs to be allowed to go live in the first place. Unsure where you stand? Check our overview of TikTok LIVE requirements.
Your LIVE access: 14 days first, then 180
One detail most guides skip: LIVE Studio access comes in stages. Once the app is installed, you check everything in one place, in the top right corner sits a button called “Your LIVE access”, and behind it the access screen with two tabs, one for each stage.
Stage 1: Get 14-day access. A checklist shows every requirement with its own check mark. At the time of writing that means at least 1,000 followers, a TikTok account that’s 30 days or older, at least one LIVE of 25 minutes or more in the last 180 days, and no recent suspensions. The exact list varies by region, so what your app shows is the source of truth. Tick every box and access is granted on the spot, for 14 days.
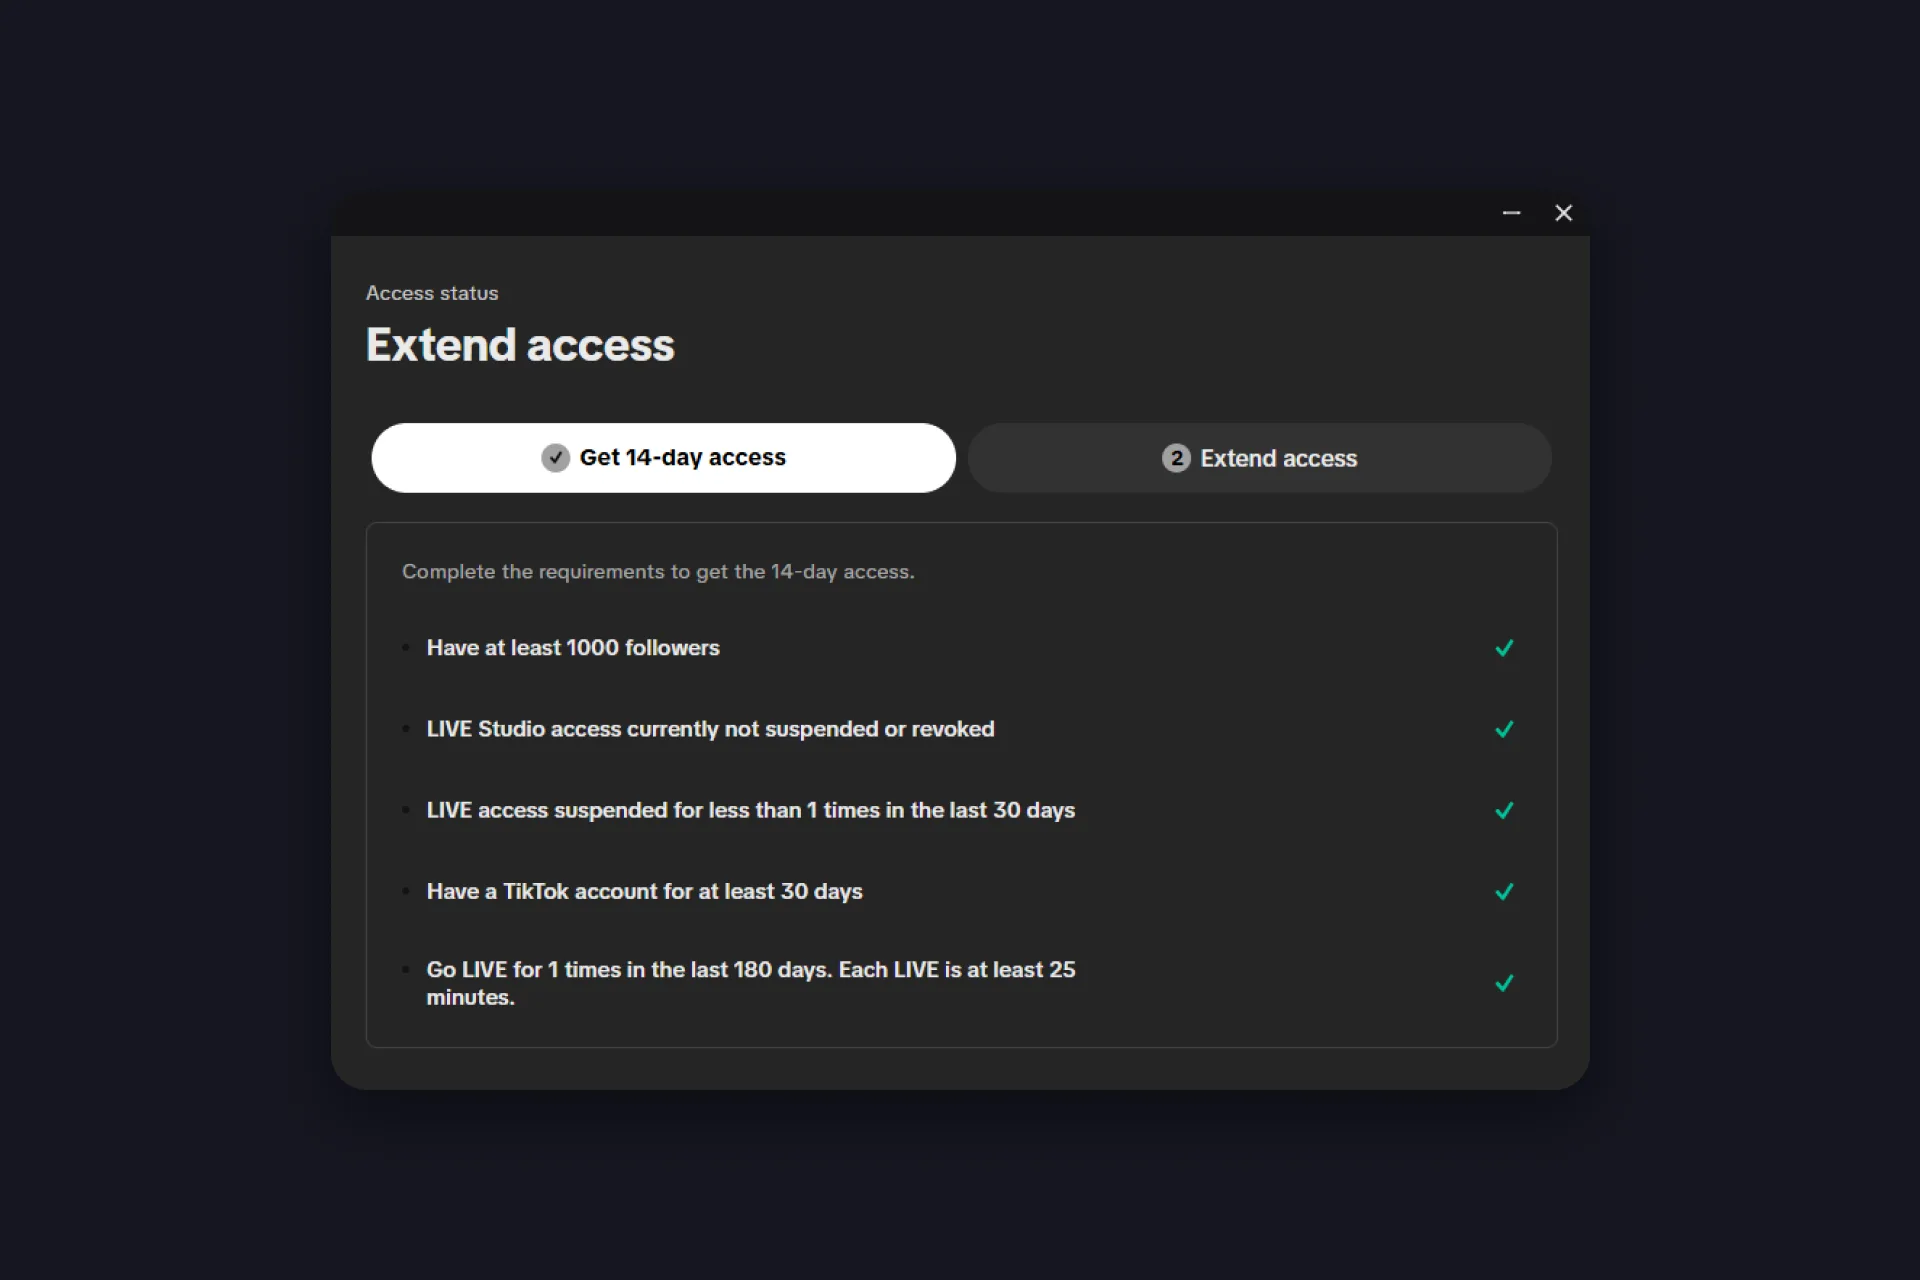
No qualifying LIVE yet? The easiest way to check that box is a single stream of 25 minutes or more from the TikTok mobile app. That session also activates LIVE Studio for your account.
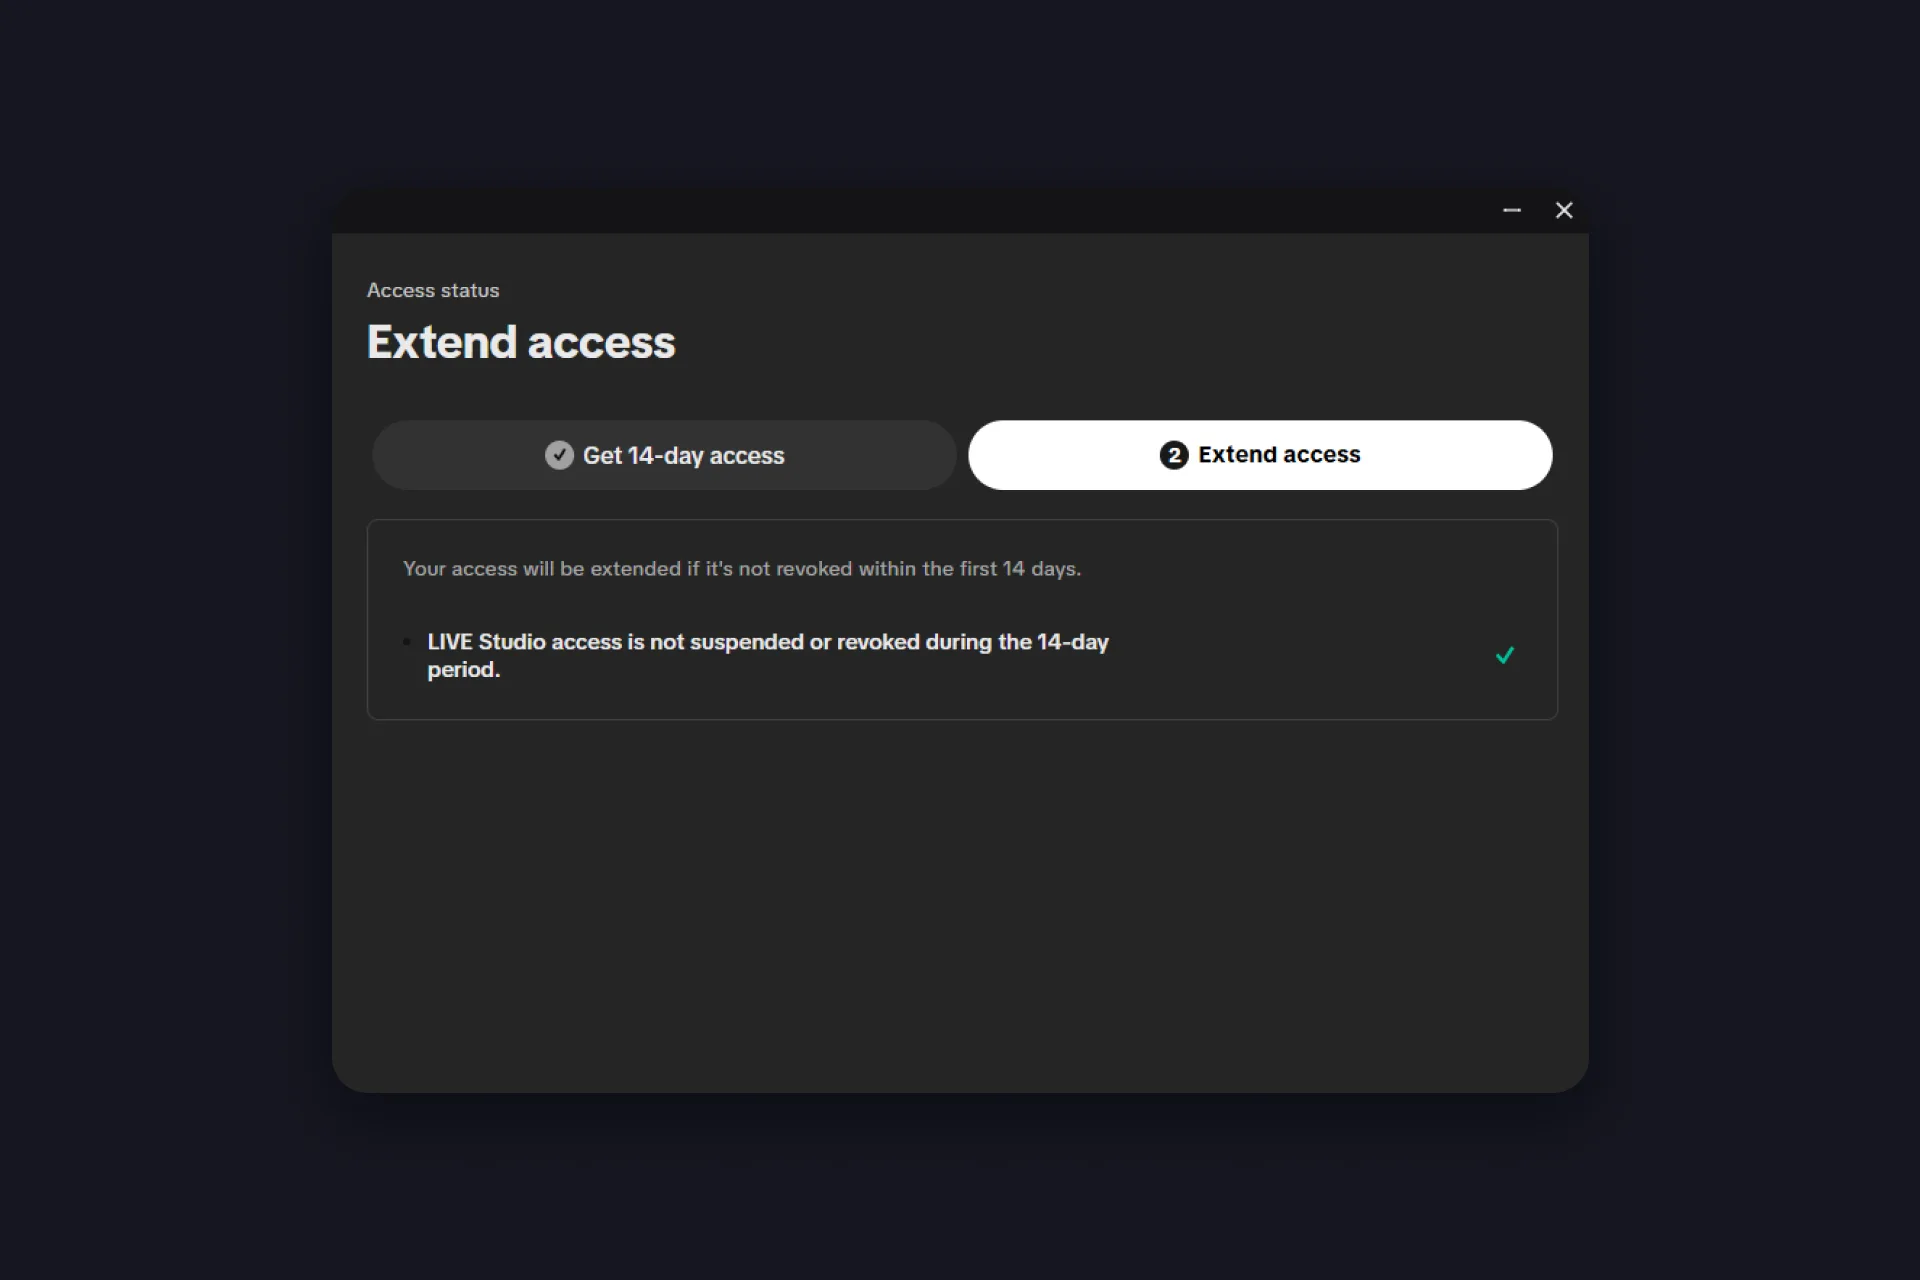
Stage 2: Extend access. Survive your first 14 days without a suspension or revocation and TikTok extends your access to 180 days automatically. The catch for trial users: TikTok expects at least two streams of 25 minutes or more in your first week, otherwise the access gets revoked before the extension ever happens. So don’t install the app and let it sit.
Download and log in
Get TikTok LIVE Studio from TikTok’s official download page and pick your version: Windows, macOS for Apple Silicon, or macOS for Intel. Skip any third-party download portals, the app is free and official. After the install you land on a welcome screen with exactly one job: “Log in to begin”.
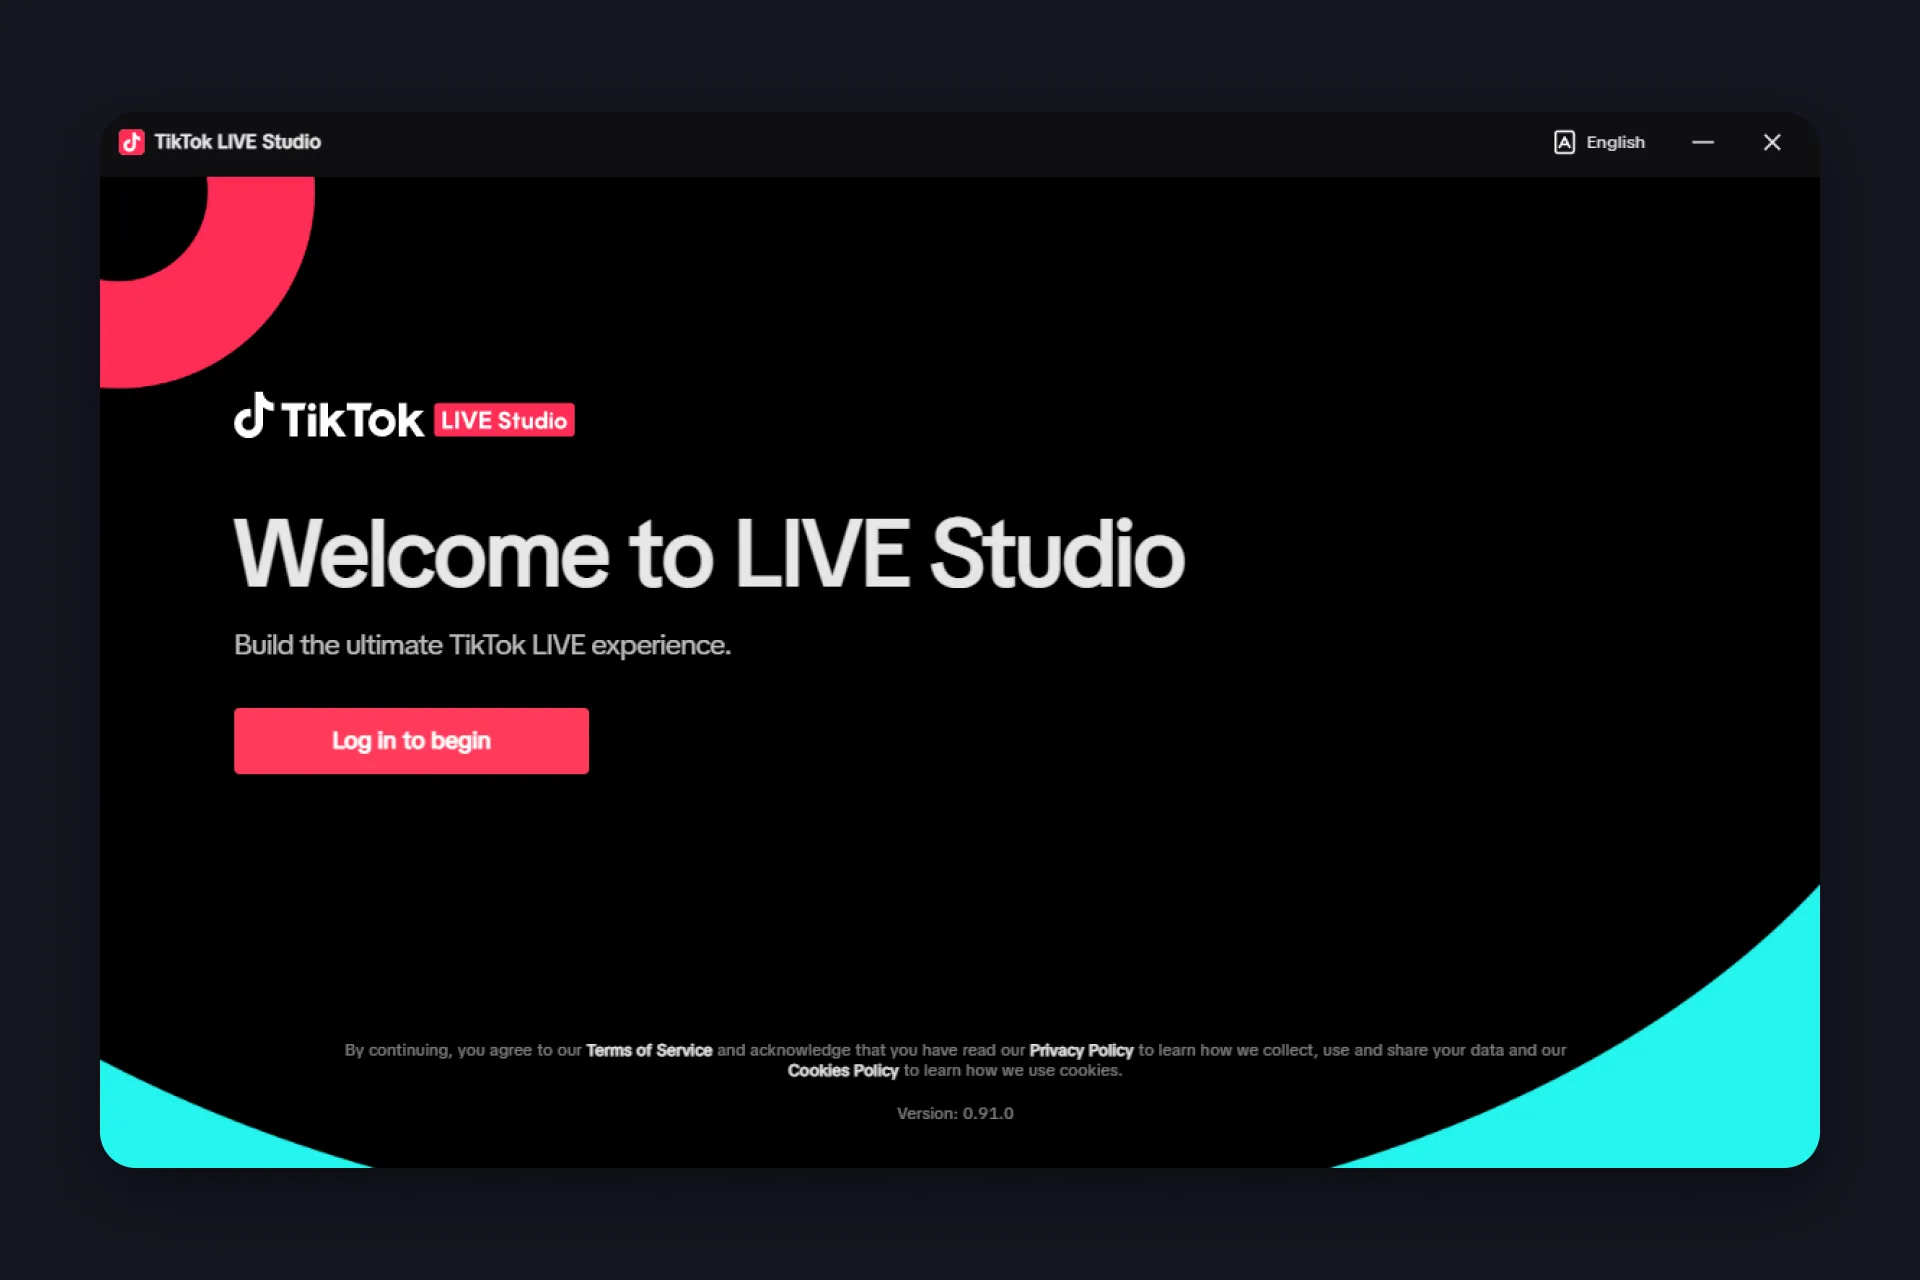
You’ve got several ways to do that:
- Scan to log in: scan the QR code with your phone camera, or in the TikTok app via Profile and My QR code.
- Email, username, or phone: the classic login form.
- Log in on tiktok.com: hands you over to your browser, handy if you’re already logged in there.
- Continue with Google and other linked accounts.
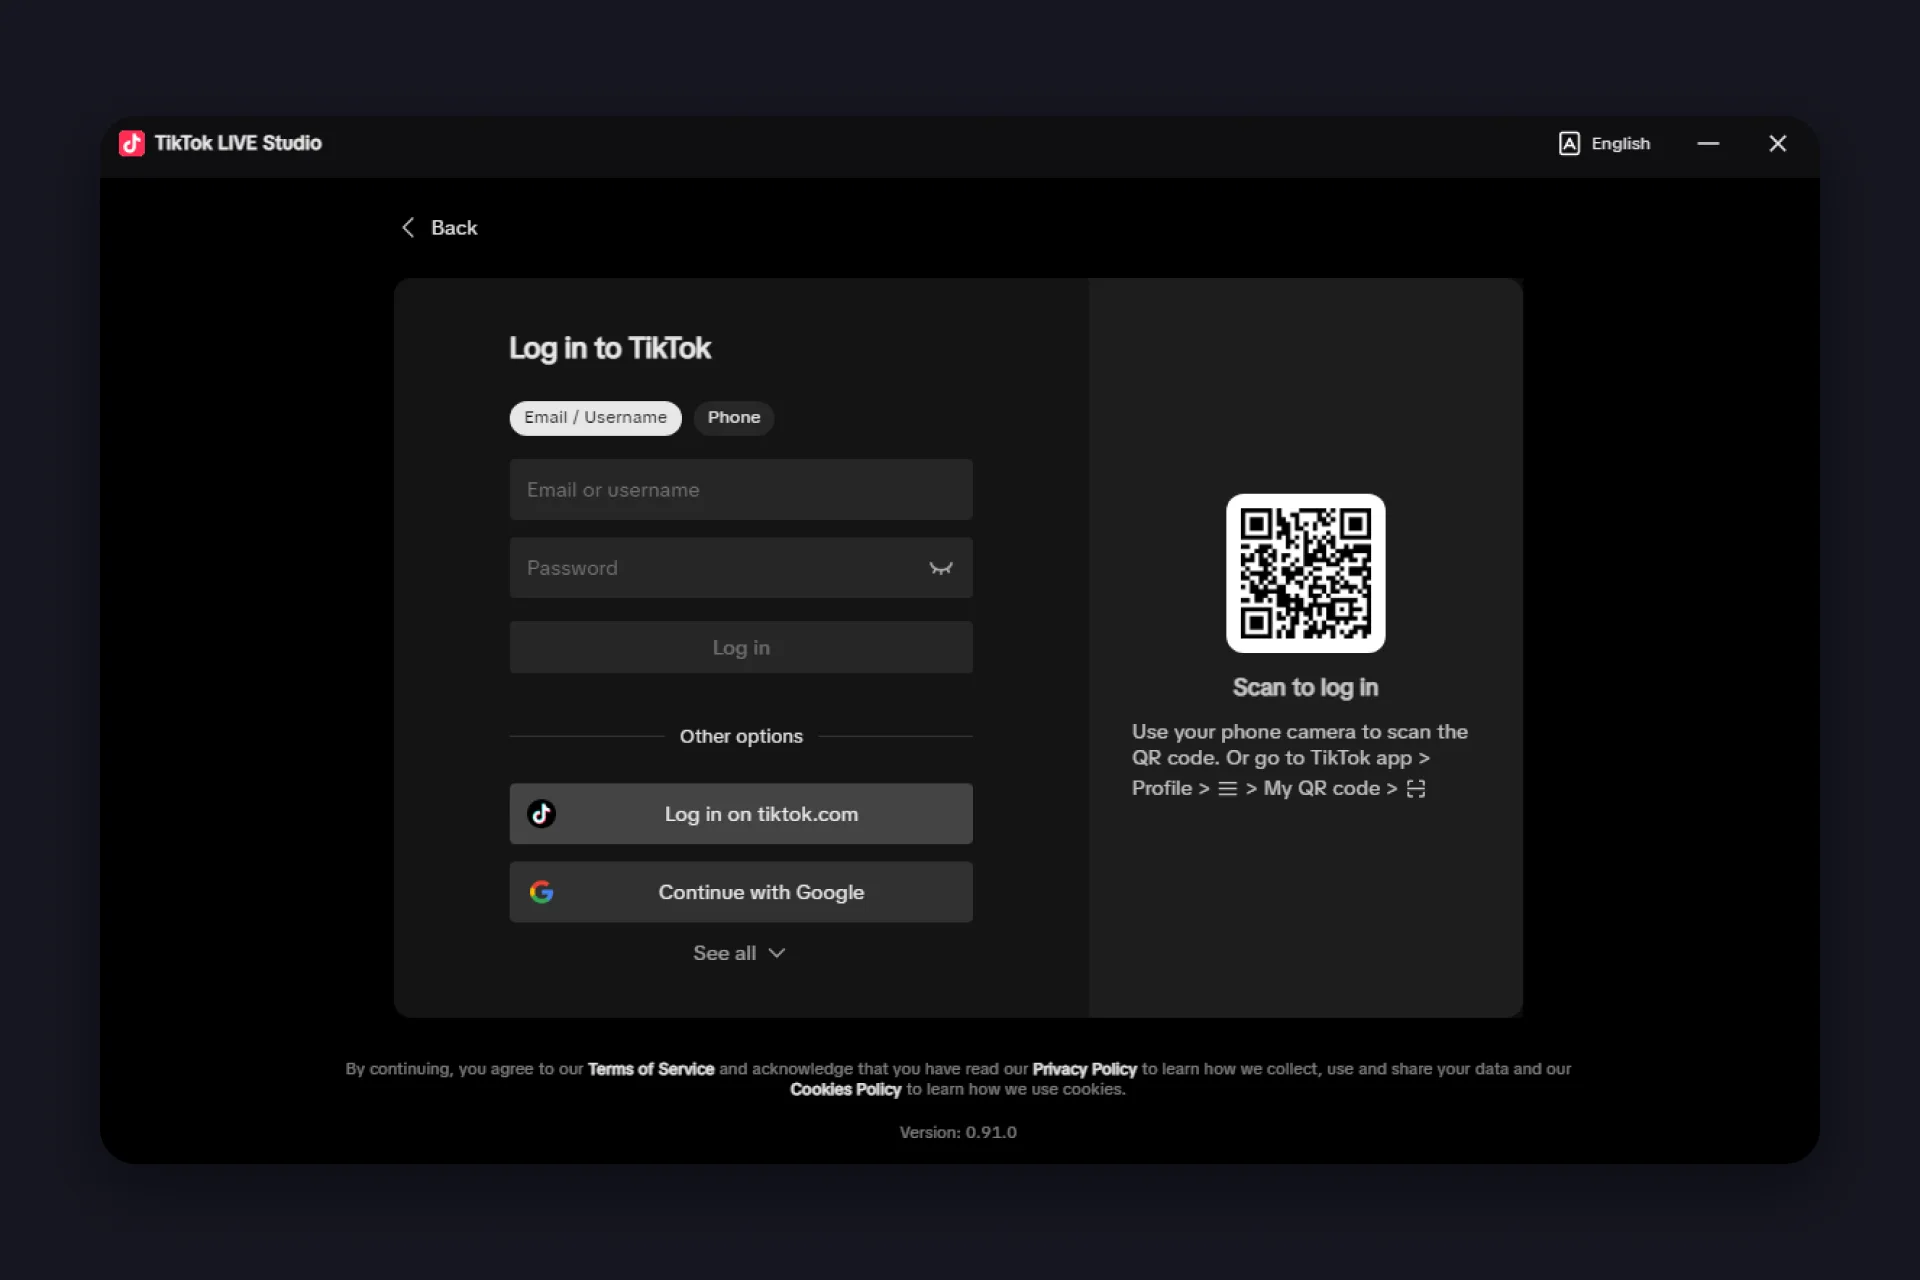
If you pick the browser route and see a “Network Error” screen, don’t panic: click “Continue on browser”, and if no browser window shows up, go back and try again. That screen is about the browser handoff, not your account. If the error keeps coming back, or the app asks you to update even though it’s already current, just switch to the QR route, it’s simpler anyway. Follow the prompts and you’re in.
And if the app tells you that you can’t stream yet after logging in, that’s an account issue, not a technical one. LIVE Studio only works for accounts with LIVE access.
First launch: the setup wizard
The easiest way to learn how to set up TikTok LIVE Studio is to let the app do it with you. Right after your first login, LIVE Studio offers to build your studio with you: “Let’s set up your studio”. You could skip the setup, and switchers can even import their settings from another tool, but the wizard is worth the two minutes. It runs in three quick steps, and gamers get a bonus fourth:
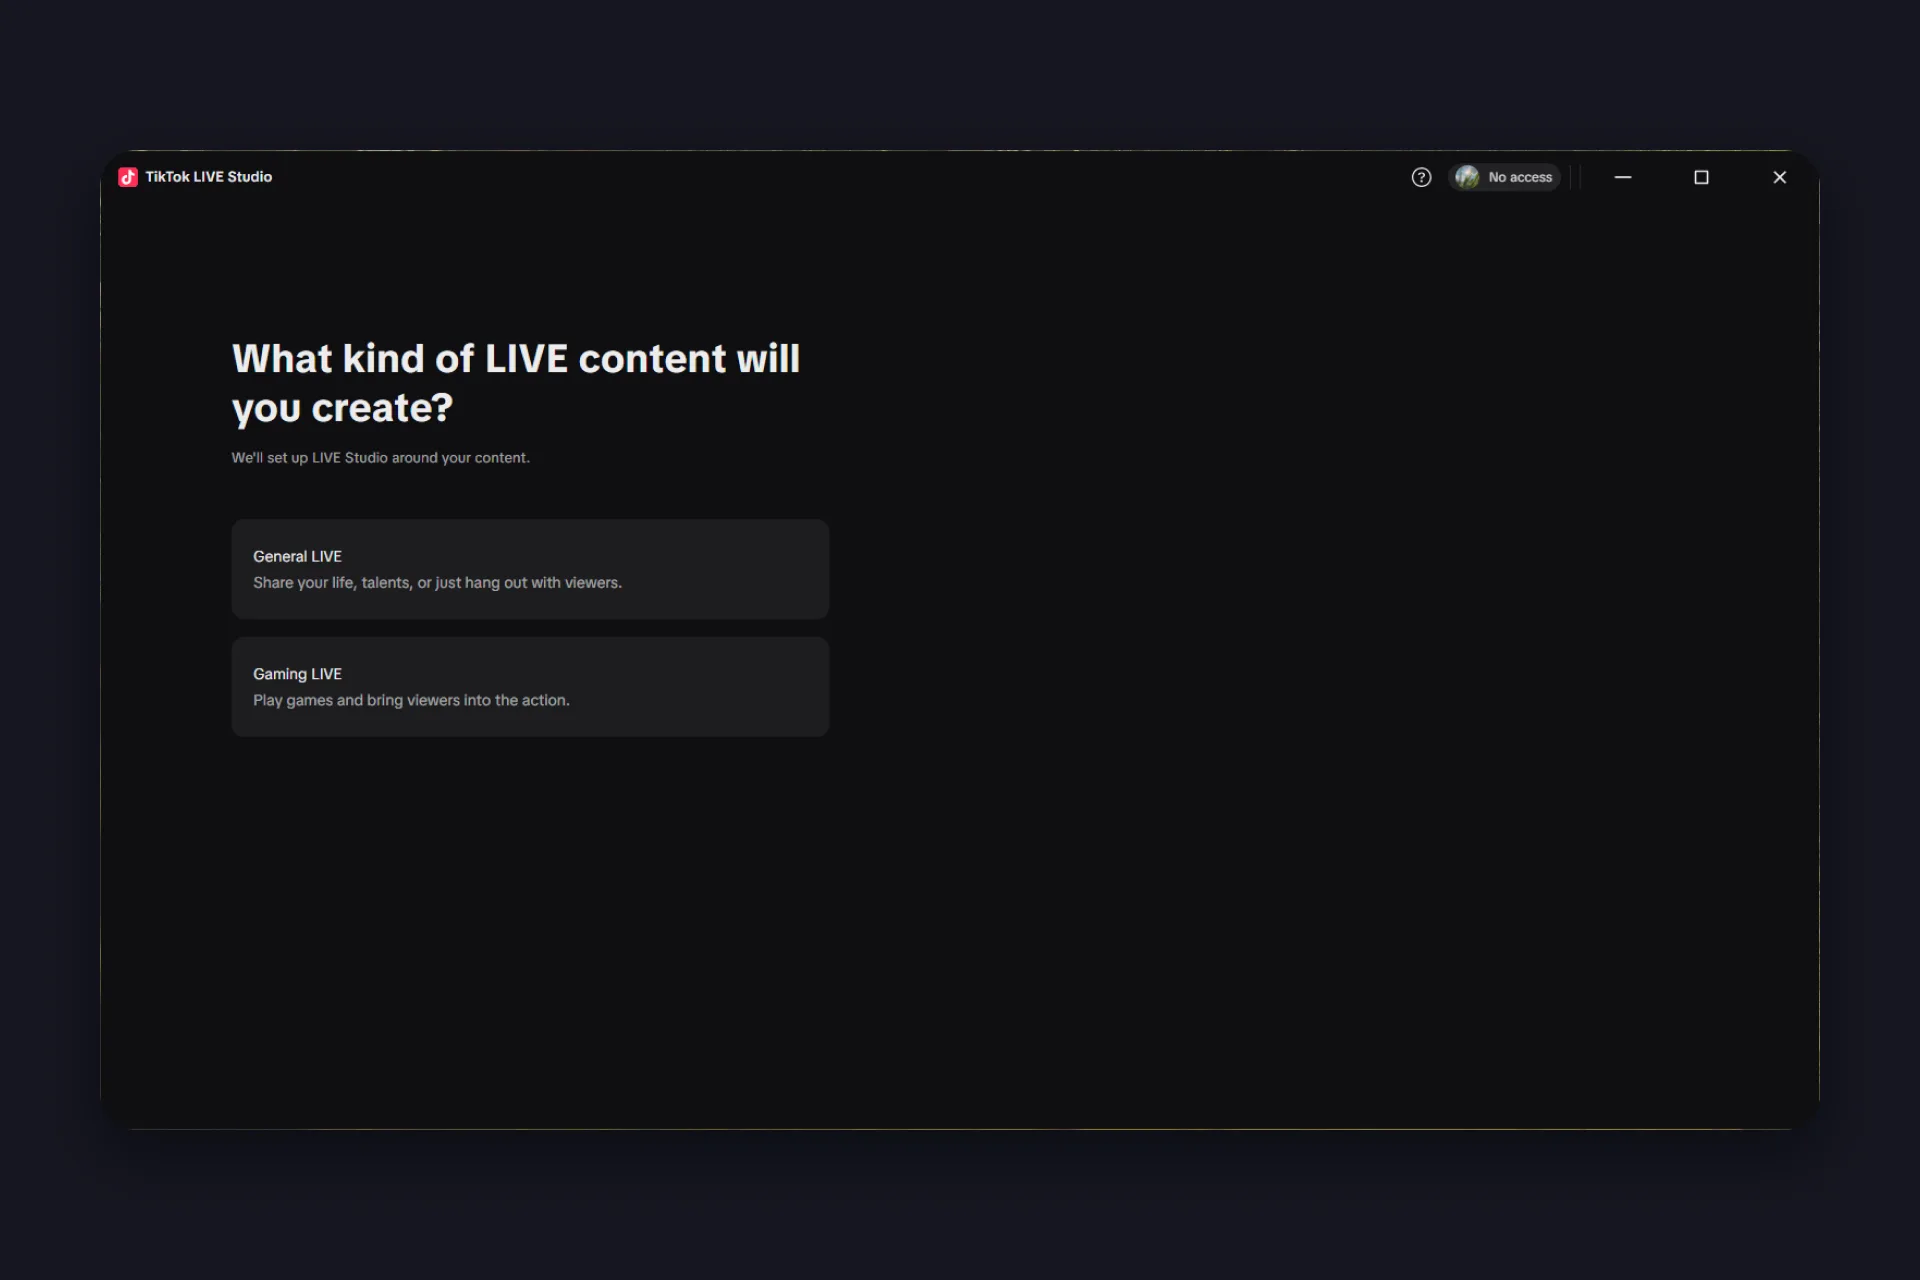
Step 1: Your content. The app asks what kind of LIVE you’ll create, General LIVE for sharing your life, talents, or just hanging out, or Gaming LIVE for bringing viewers into your games, and it sets up LIVE Studio around your answer.
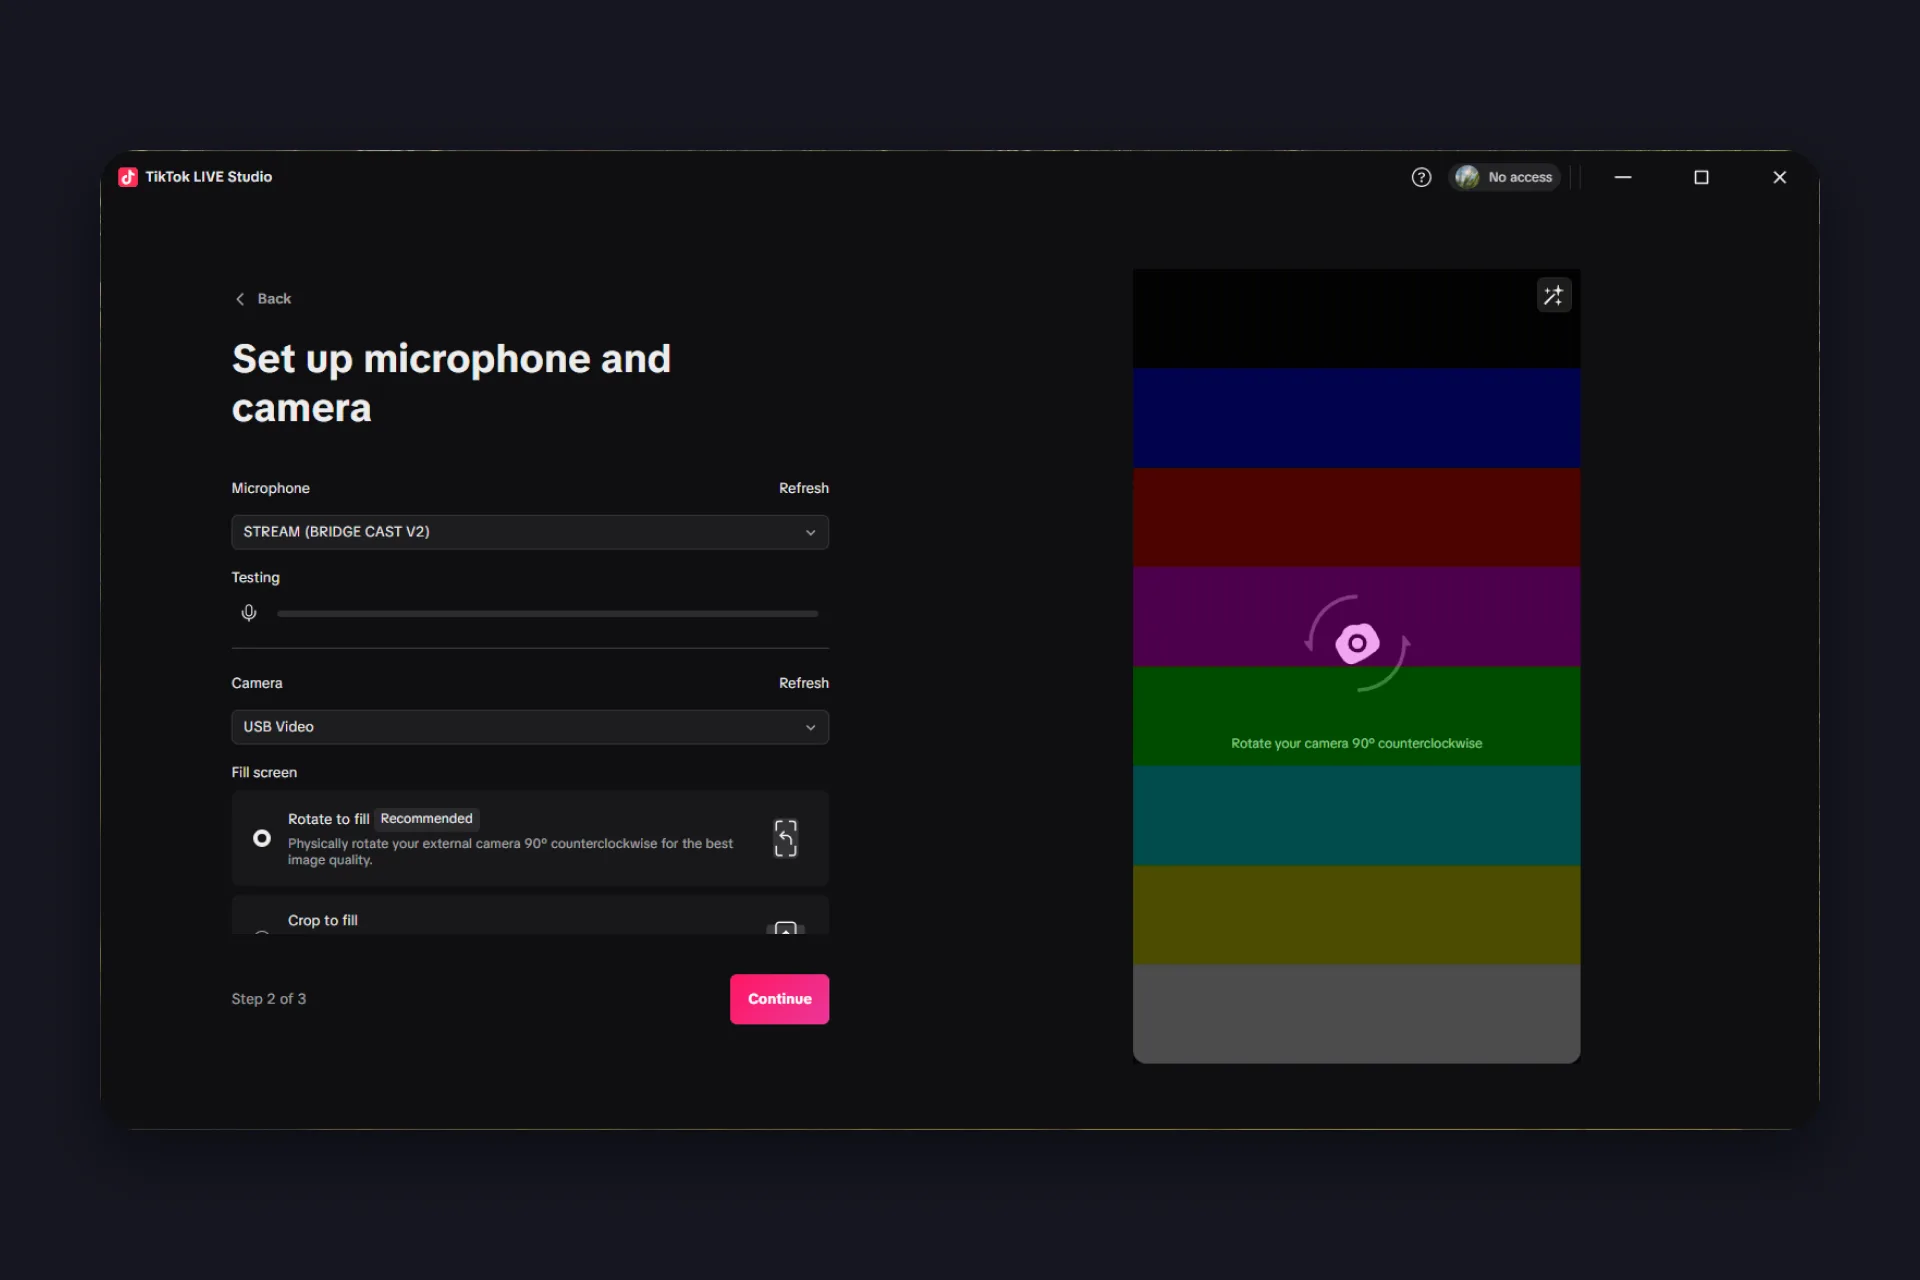
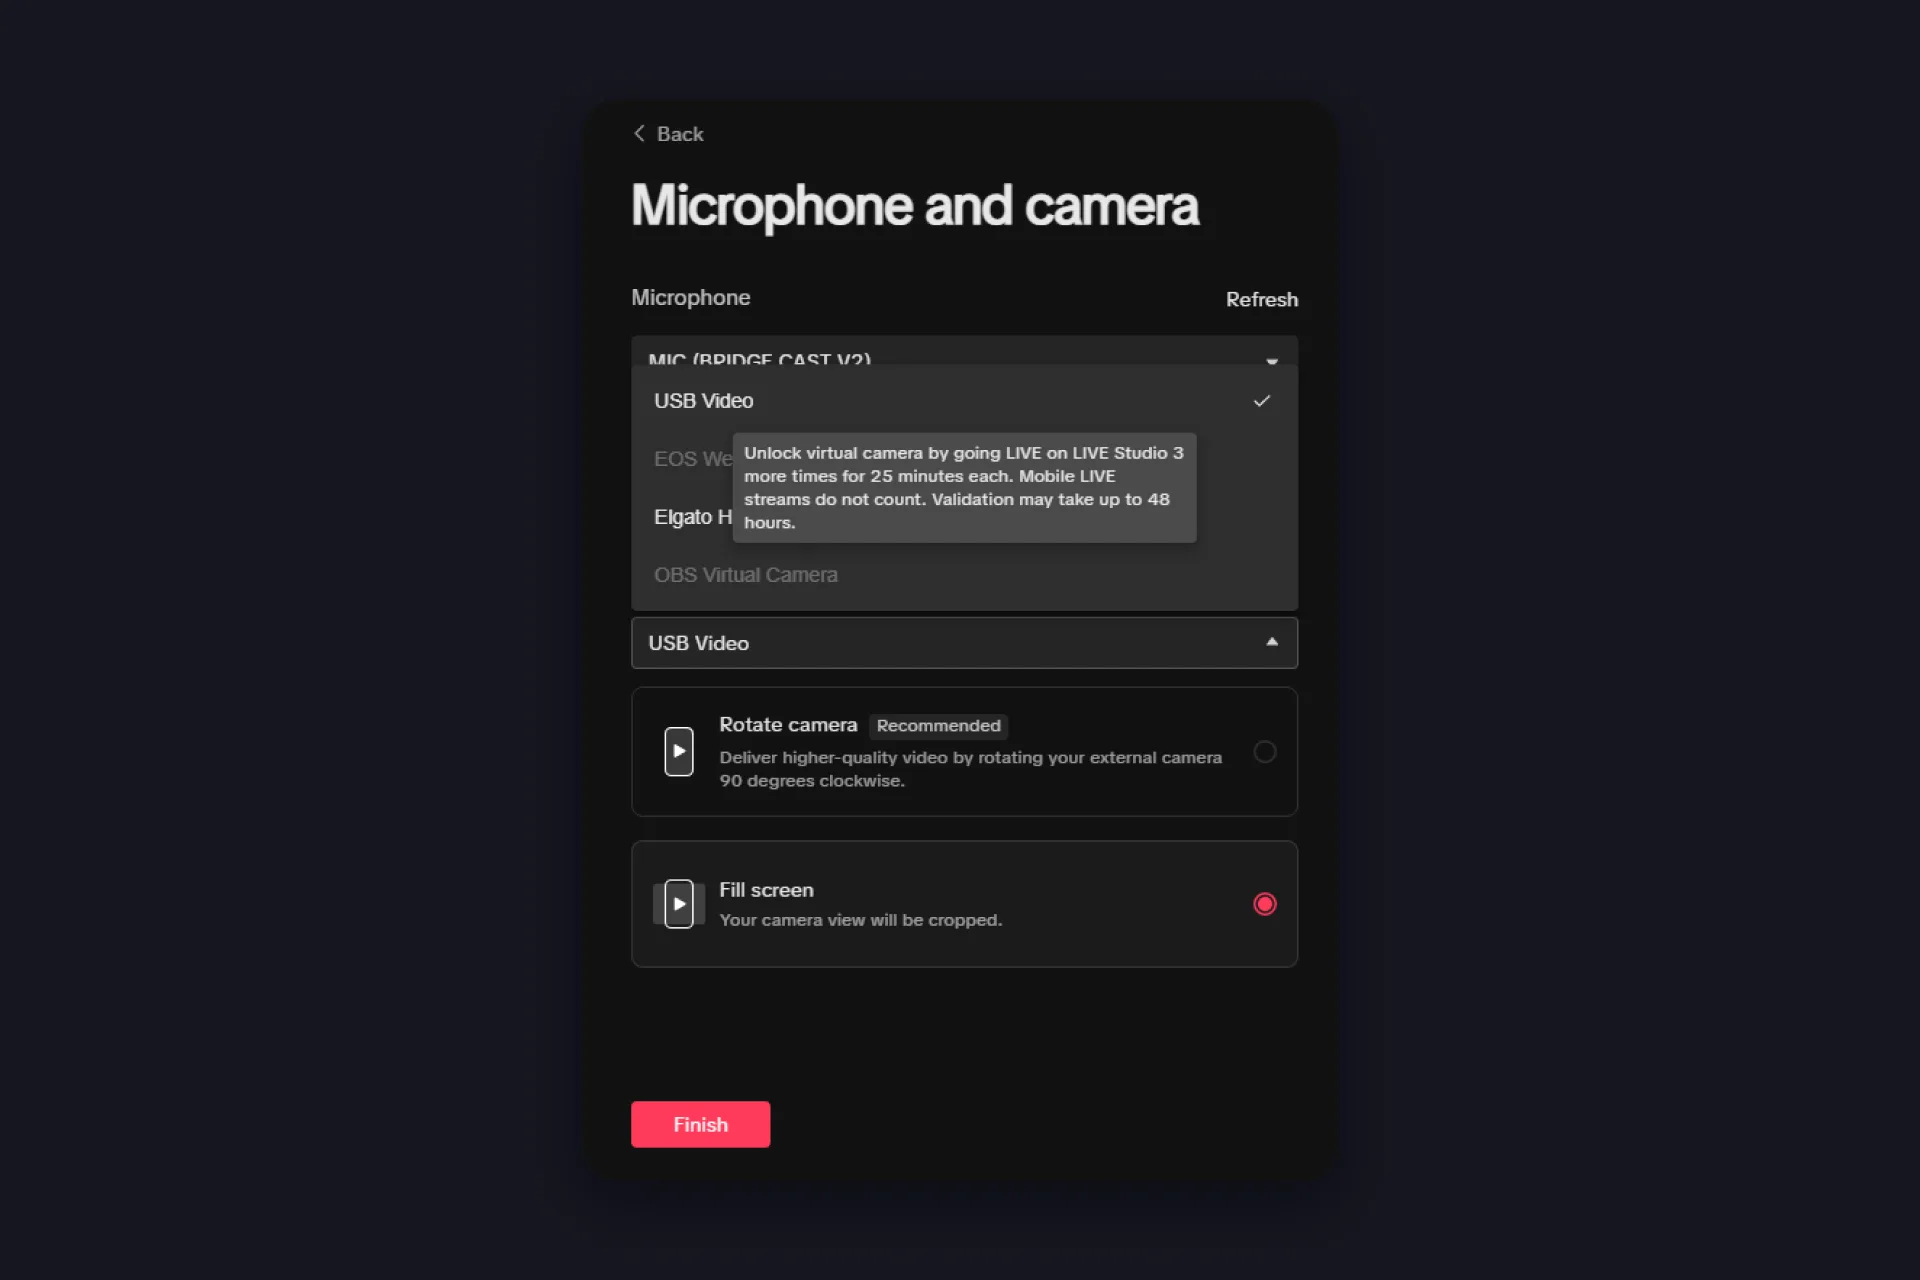
Step 2: Microphone and camera. Pick your mic and your camera and test both on the spot. Under “Fill screen” the app recommends rotating an external camera 90 degrees counterclockwise for the best portrait quality, and “Crop to fill” is the fallback if you can’t.
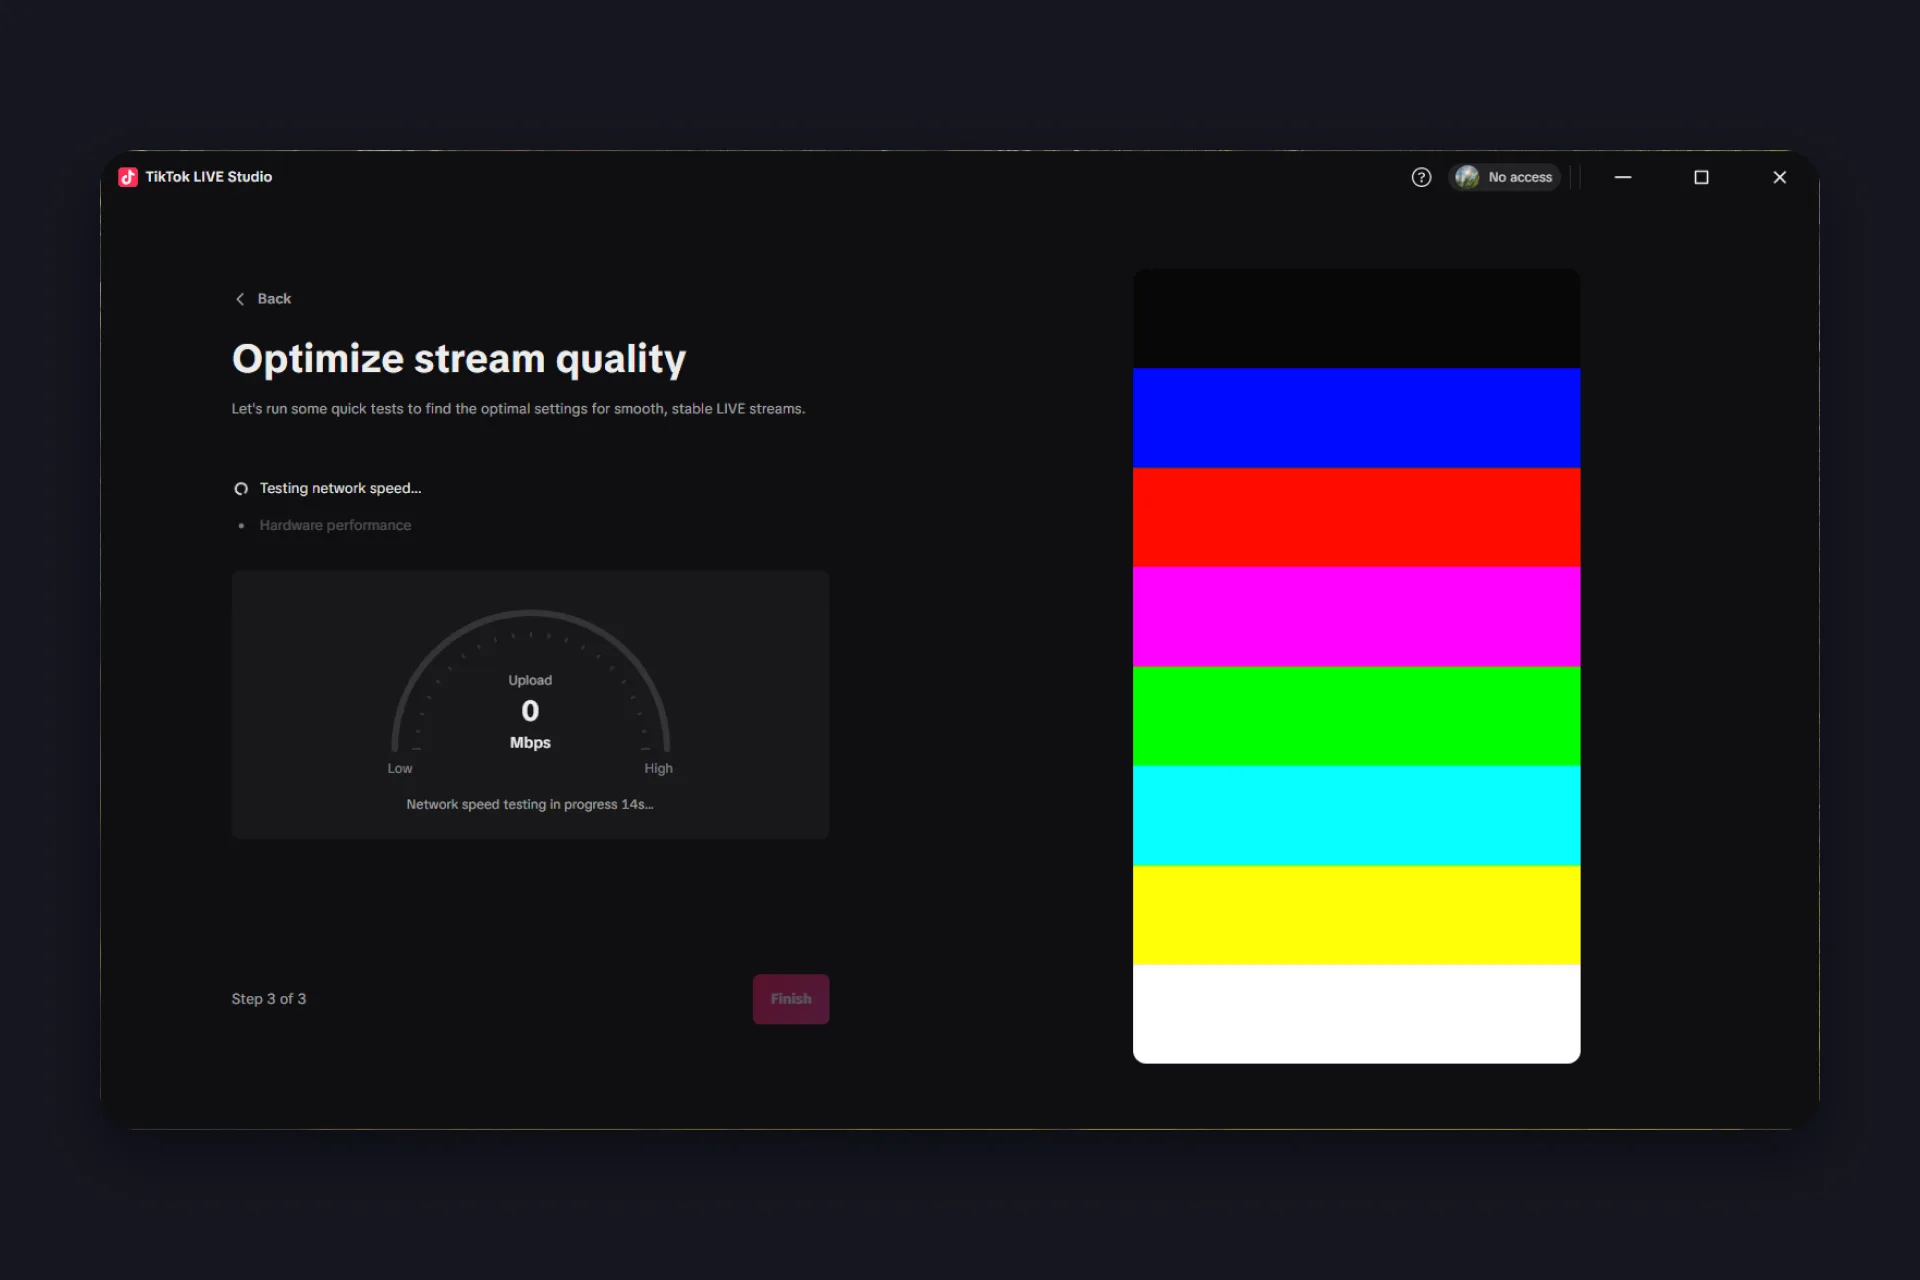
Step 3: Stream quality. The app runs a network speed test and checks your hardware performance, then applies the settings that fit your setup. Let it finish, this is the reason most LIVE Studio streams look right without anyone touching a single bitrate setting.
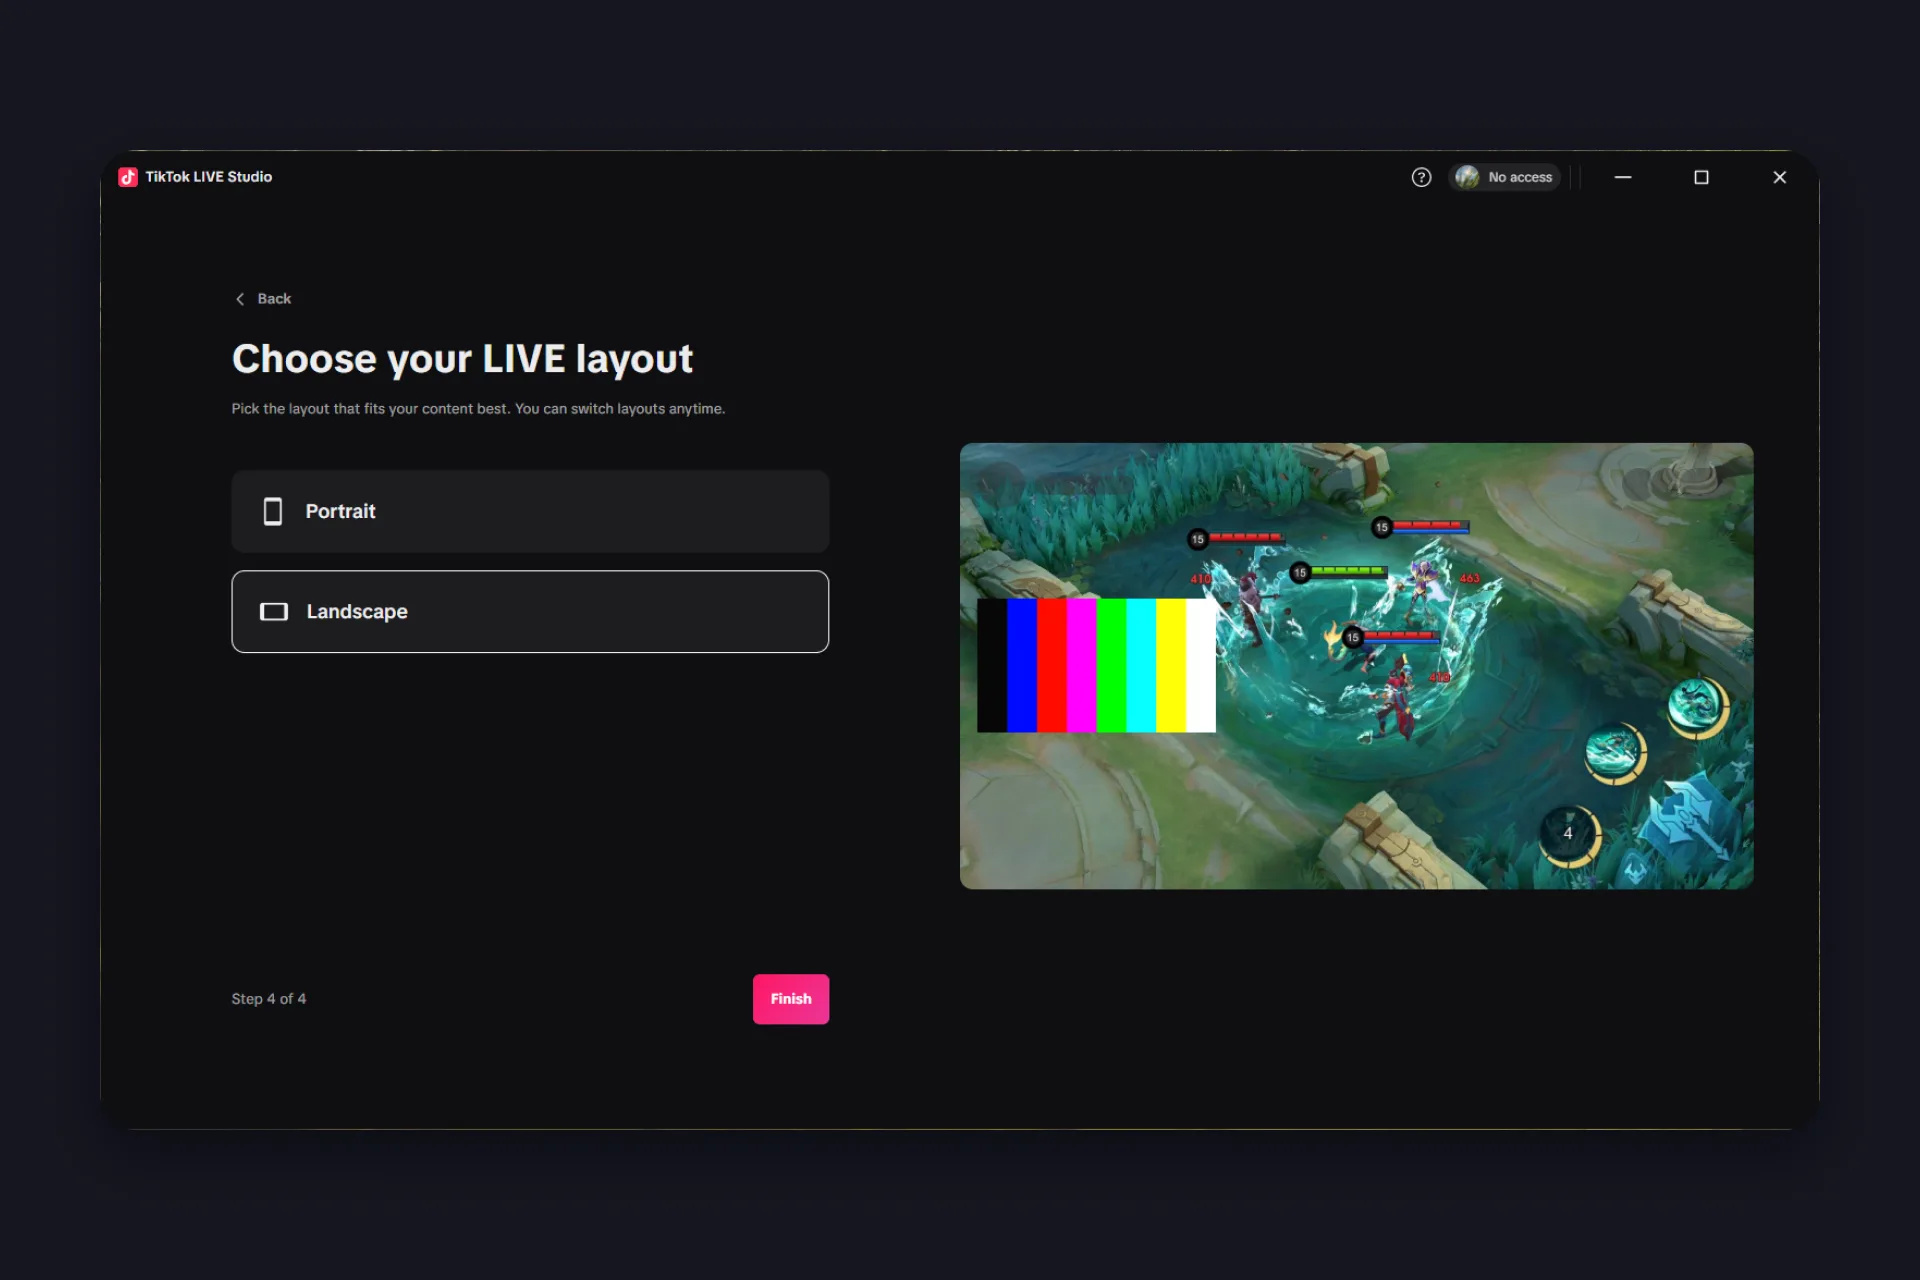
Step 4 (gaming only): Your LIVE layout. If you picked Gaming LIVE, the wizard adds one more choice: portrait or landscape. Take whatever fits your game and don’t overthink it, you can switch layouts anytime later.
Hit Finish and you’re in the main interface. You can change all of this later in the settings, so don’t overthink your first picks.
Set up your scene
Now the fun part. A scene is everything your viewers see, and it works like a sandwich: whatever sits higher in the source list covers whatever sits below it. Camera hiding behind the game? Nothing’s broken, it’s just under the wrong slice. So let’s build your scene the sandwich way, bottom to top:
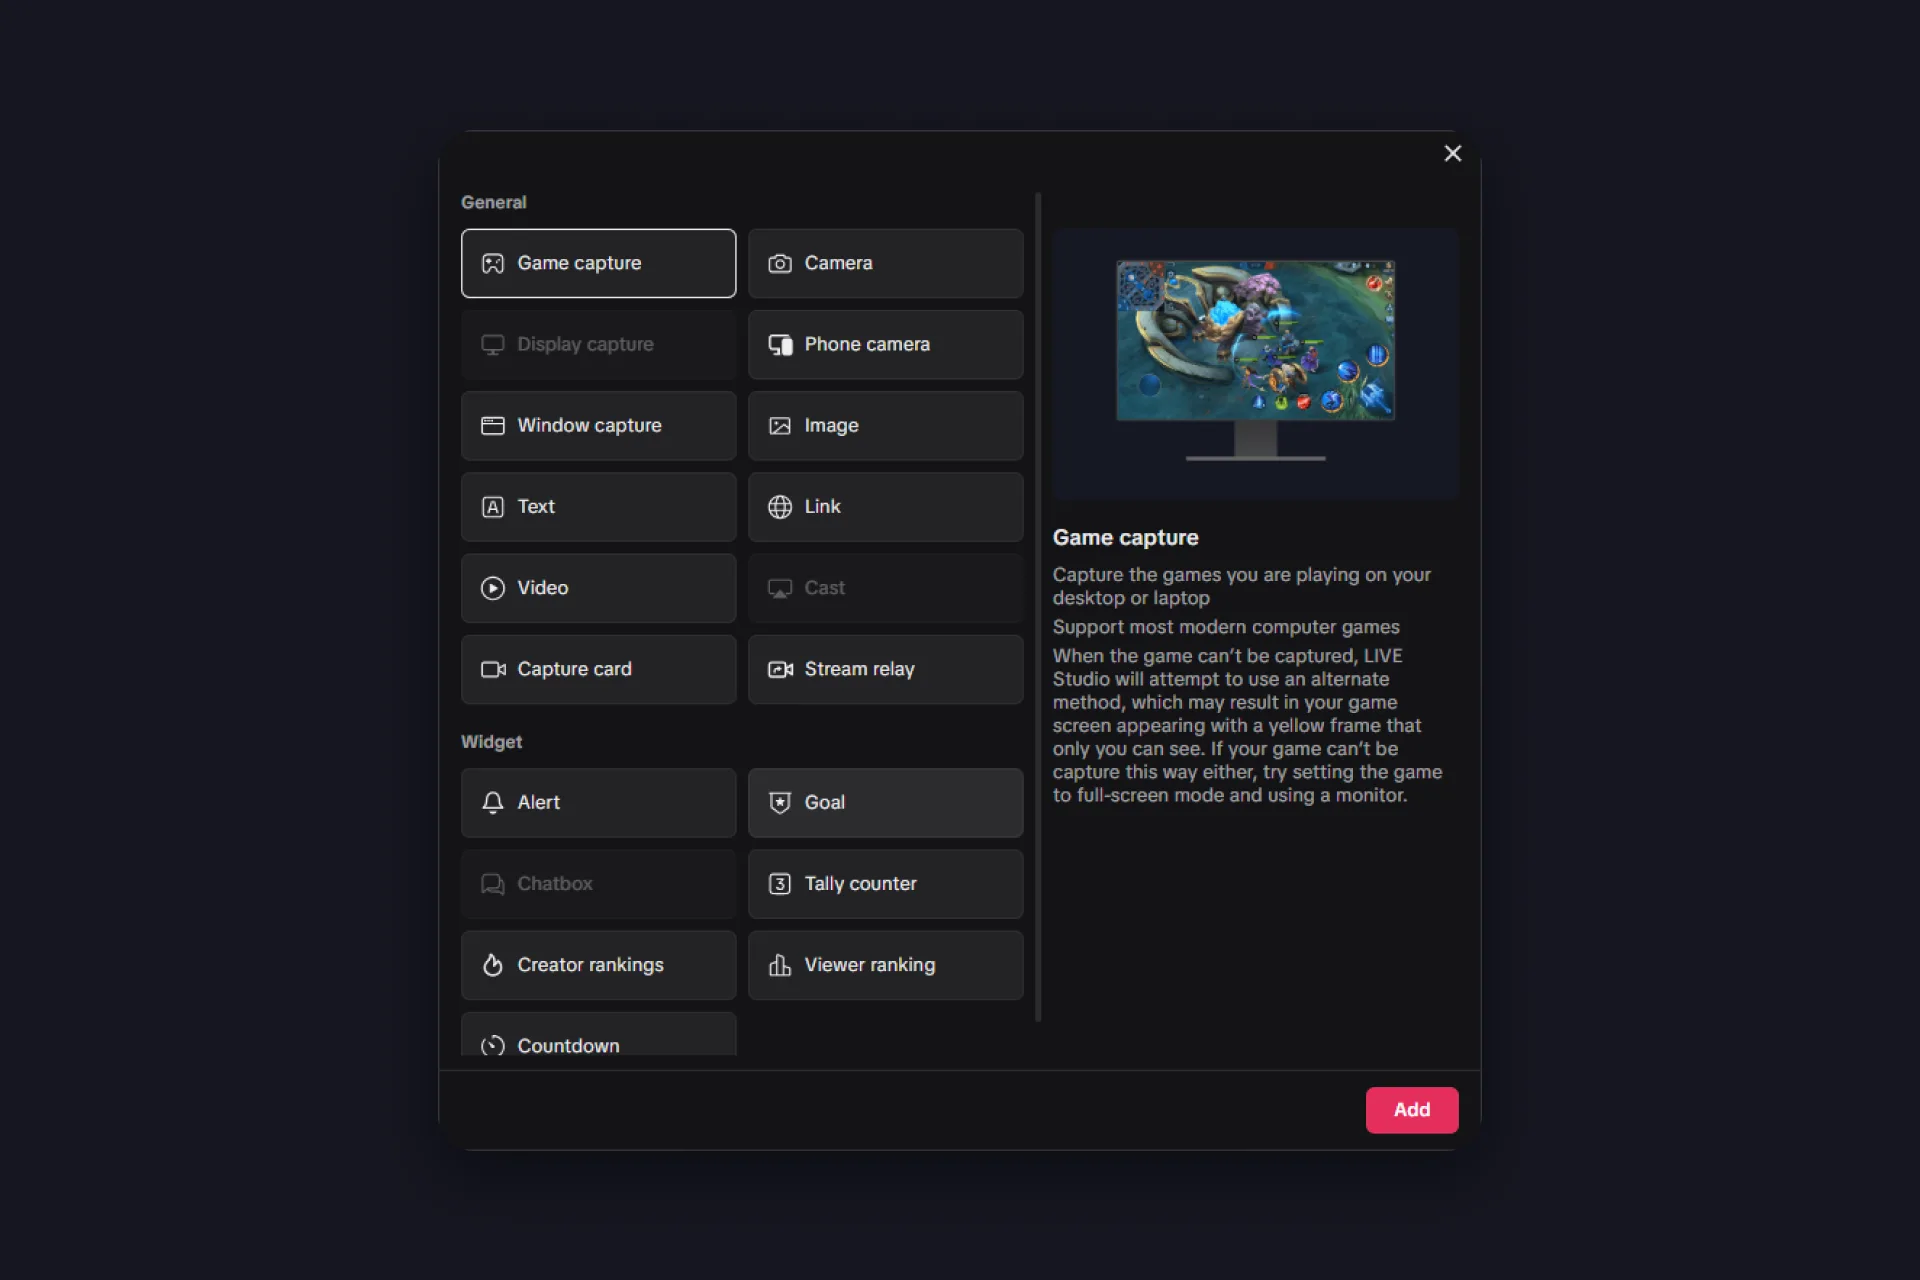
1. The bread: your game or screen. Add a game capture and LIVE Studio grabs the game directly. Got a stubborn game that won’t be captured? Window or display capture is your fallback. Console player? A capture card brings your PlayStation, Xbox, or Switch in via HDMI, and the cast source mirrors your phone screen for mobile games.
2. The filling: you. Add your camera and drop it in a corner. Background removal gives you a virtual backdrop without owning a green screen, and if you’re camera shy, digital masks and animated avatars mirror your movements. A phone camera even works as a free second angle.
3. The toppings: text, images, video. A “starting soon” clip, your branding, an announcement. Nice to have, easy to overdo.
4. On top, always: alerts and widgets. They exist to be seen, so nothing gets to cover them. LIVE Studio ships a few basic ones, and the link source is the door for TikFinity alerts and goals, more on that in a second.
Two finishing touches. First, build a scene for every mood, one for gameplay, one for just chatting, one for breaks, and switch between them while you’re live. Scenes come as portrait, landscape, or dual layout, and portrait wins for most TikTok streams, your viewers hold phones. Just don’t go source-crazy, the app itself warns that too many can affect your LIVE’s stability.
Second, check the mobile preview before you go live, it shows your stream from the viewer’s side, including the For You feed, where first impressions happen. Your stream’s title and topic get their own stop further down, right before you go live.
Check your audio and connection
Picture gets the attention, audio loses the viewers. Give your sound two minutes before your first stream.
Talk into your mic and watch the levels in the mixer: you want movement without hitting the red. If you play game sound or music, balance it so your voice always sits on top.
Want to hear what your viewers hear? Switch on audio monitoring in the mic settings and hit “Test audio” in the mixer. The most honest check of all: hit Record in the control bar, run your setup for a minute, and watch the clip back. That’s your stream exactly the way viewers get it, before anyone else sees it.
And remember the mic icon in the control bar: one click mutes every microphone at once, your emergency brake for sneezes and doorbells.
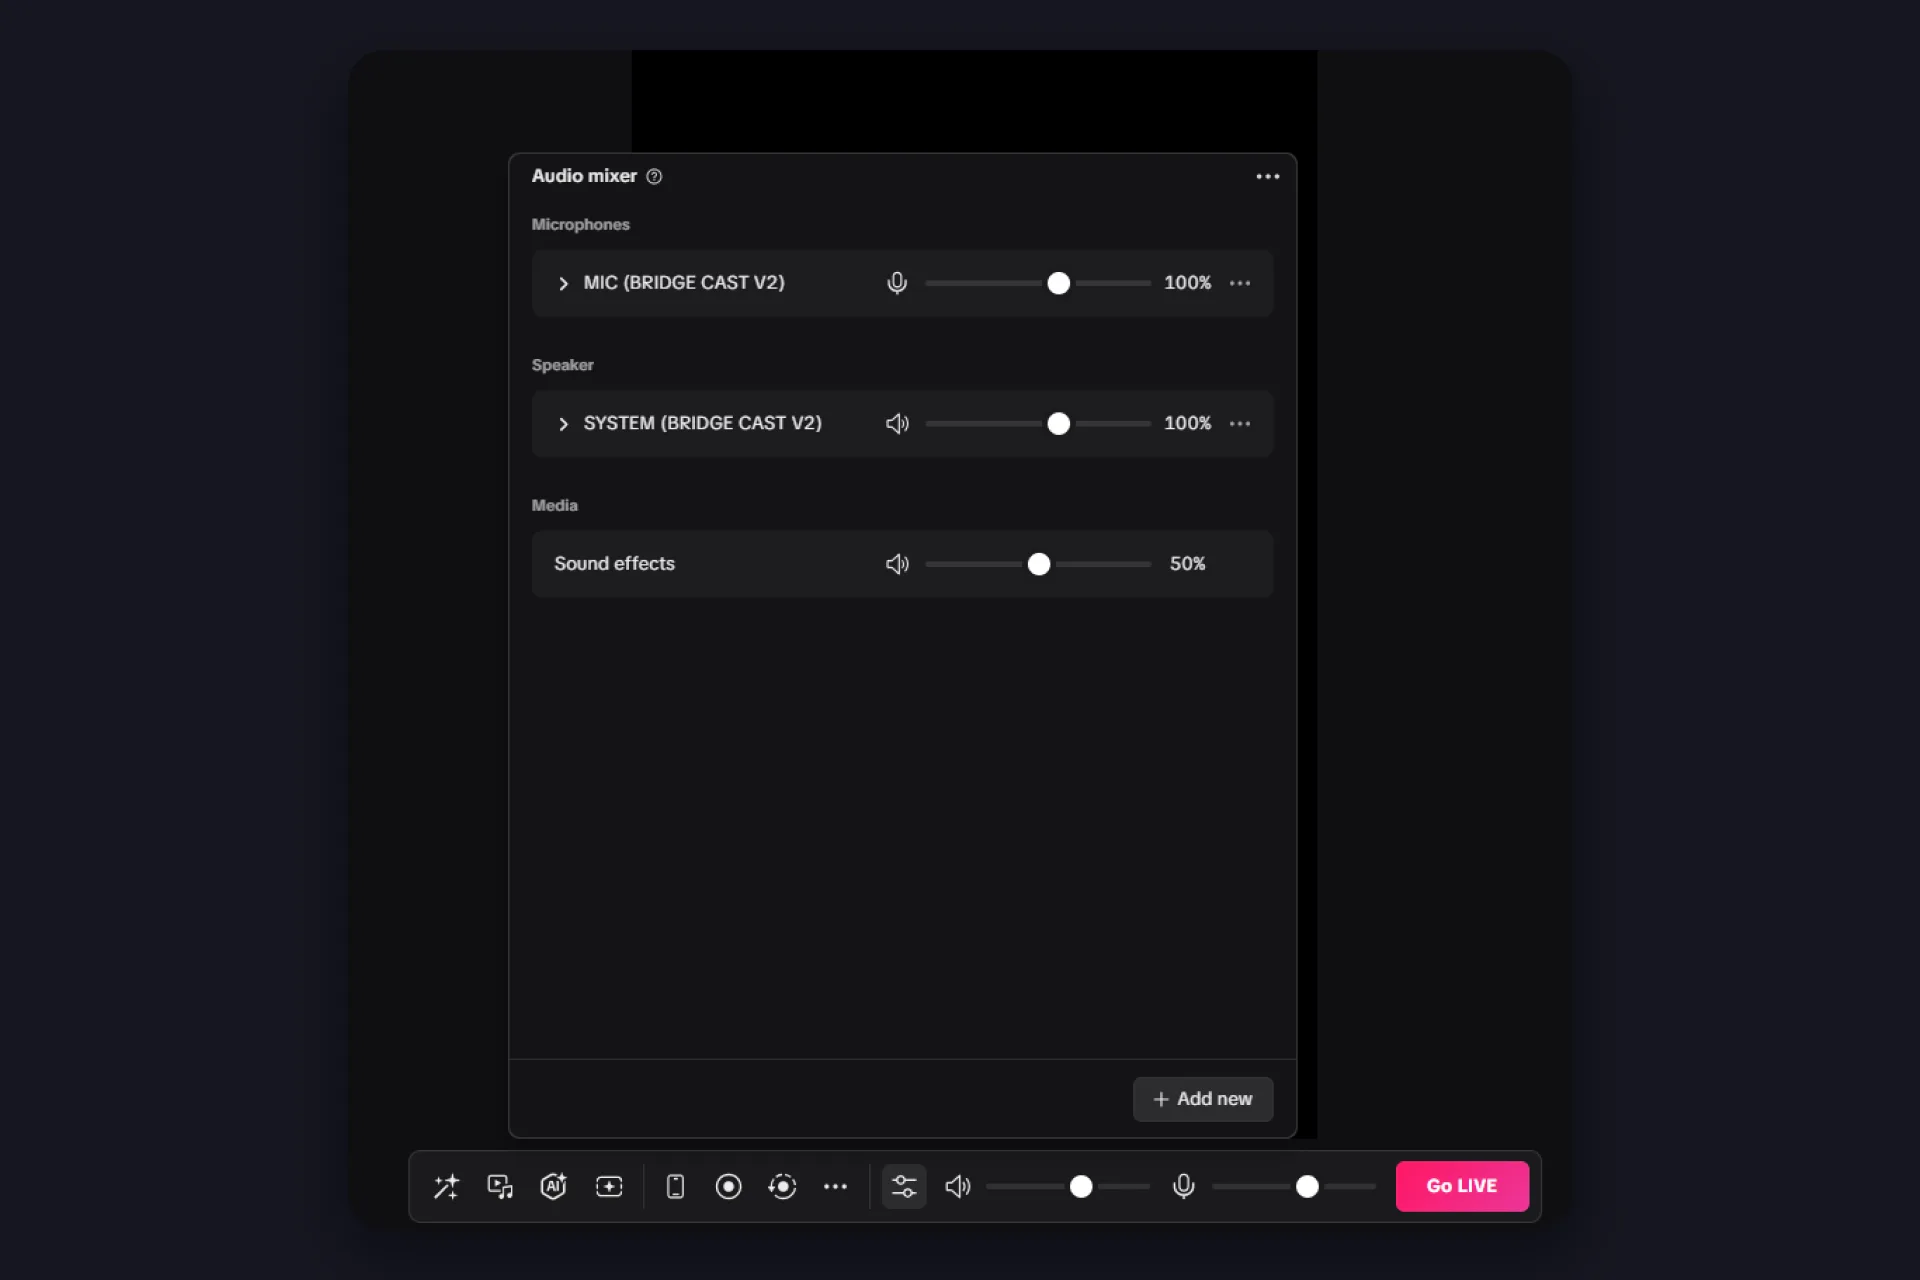
Your connection matters just as much. Use a wired connection if you can, or at least solid Wi-Fi close to the router, and close downloads and cloud syncs before going live. A short private test stream tells you more than any settings page, watch it back and listen for stutter.
Add alerts and widgets with link sources
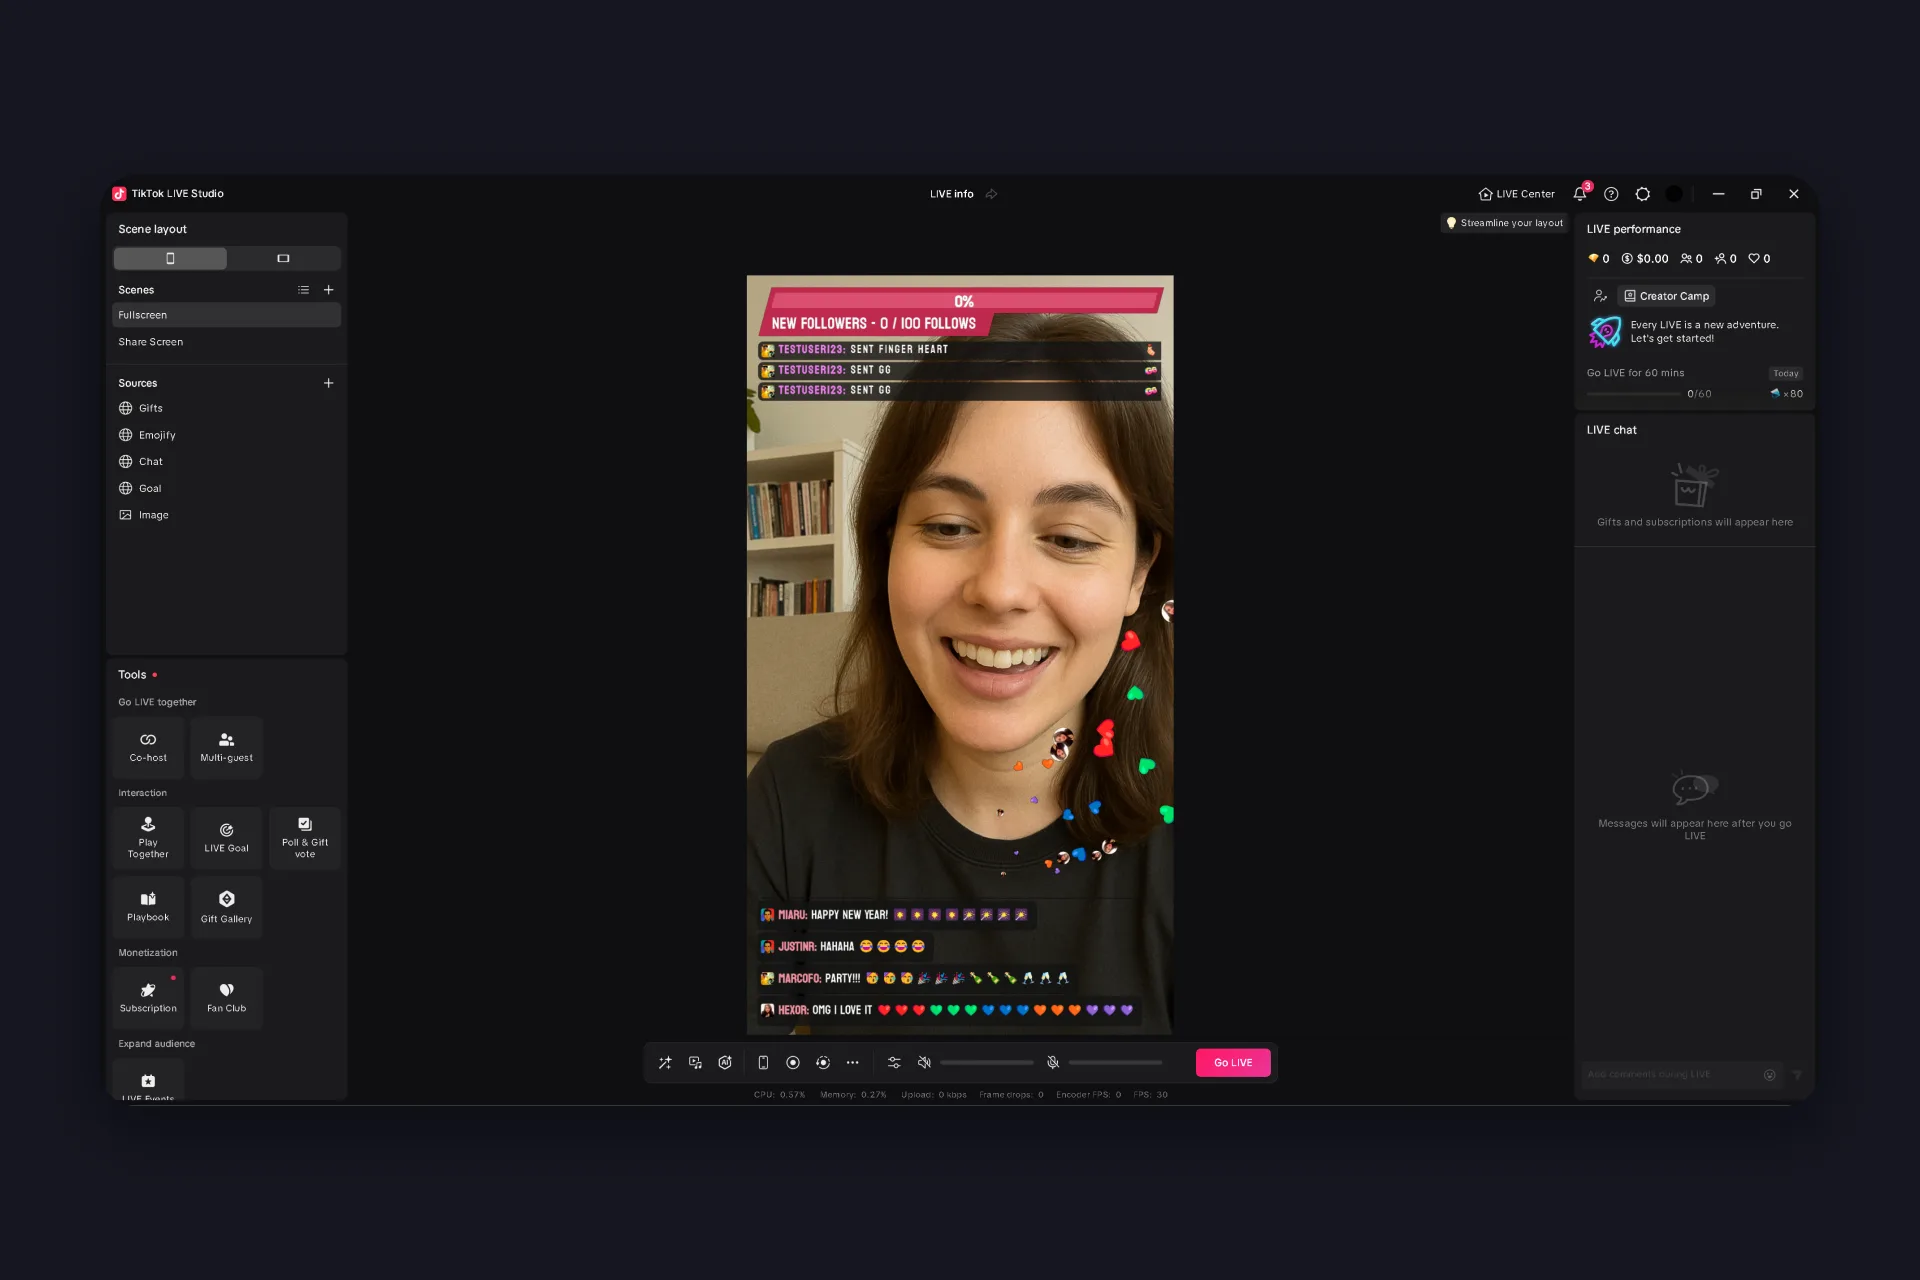
LIVE Studio ships a few widgets of its own: the Add source menu has a widget section with a basic alert, a goal, a chat box, viewer rankings, and a countdown. They’re fine for a quick start, but they look the same on every stream and give you little to customize.
When you want alerts that sound and look like you, custom sounds, per-gift reactions, your own designs, that’s what the link source is for. A TikTok LIVE Studio overlay is nothing more than a web page embedded into your scene, and that page can come from anywhere.
TikFinity gives you free overlays and alerts for gifts, follows, and subs. The setup takes minutes:
- Open TikFinity in your browser, register or log in, and enter your TikTok @username.
- Pick a widget, for example a follower goal, and copy its URL. For gift alerts, build an action in Actions & Events and copy the overlay screen URL from there.
- In LIVE Studio, add a link source and paste the URL.
The widget shows as offline until it sits in LIVE Studio and you’re live, that’s normal. Add sound alerts too, so you hear every gift even when you’re focused on the game.
Set your title and topic before you go live
You’re ready to hit Go LIVE! That means you’ve reached the last step: title and topic. At the very top of the app sits a button called “LIVE info”. Click it and a LIVE settings window opens (it also pops up when you hit Go LIVE, so you’ll meet it either way), and this is where your stream gets its face:
- Title: say what’s actually happening in this stream, not just “hi”. Viewers scrolling the feed decide in a second whether to tap.
- Topic: pick the one that really matches your content. TikTok compares what you stream with the topic you chose and even warns you when they don’t line up, and a matching topic helps the algorithm show you to the right viewers.
- About me: 240 characters for who you are, what your LIVEs are about, and your perks. Fill it once, it works for every stream.
- Cover: swap the auto cover for a custom one, that’s your thumbnail in the feed.
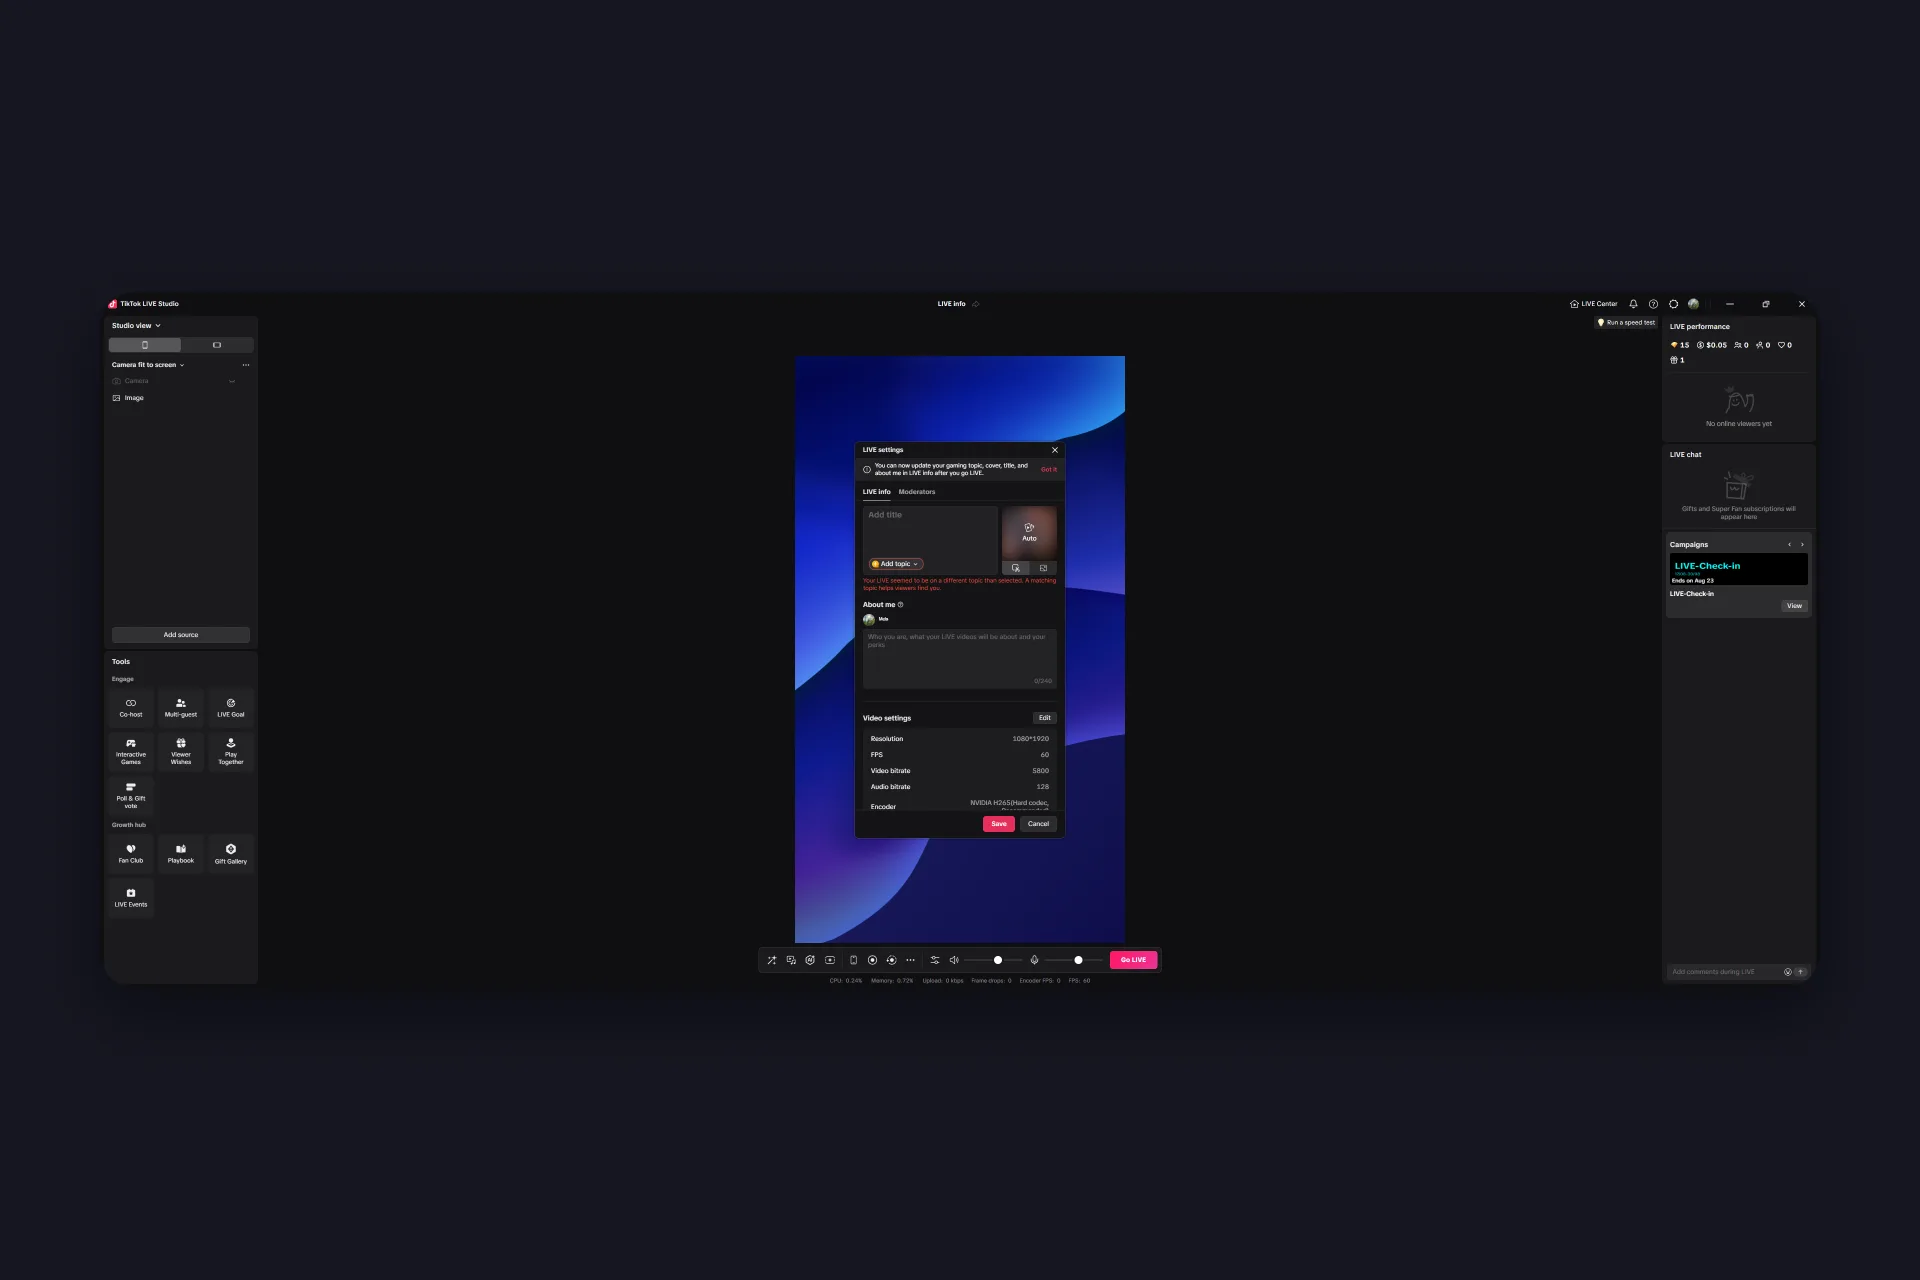
The same window also lists your video settings, resolution, FPS, and bitrate, in case you ever want to double-check what the setup wizard picked for you.
Go live and run your stream
One last detour before the big moment: open Settings and check the Chat tab. That’s where you set the rules before anyone types:
- Keyword filters and spam protection
- Who can send Star Comments
- Which events show up in chat: gifts, new followers, likes, shares
- A floating chat window that stays visible over a fullscreen game
Then take a breath and hit Go LIVE, this is what the whole setup was for. You’ve prepared more than most streamers ever do, enjoy it.
While you’re on: keep an eye on the chat panel, greet people by name, and react to gifts as they come in. The first minutes decide whether viewers stay, so talk from second one, even if the room is still empty.
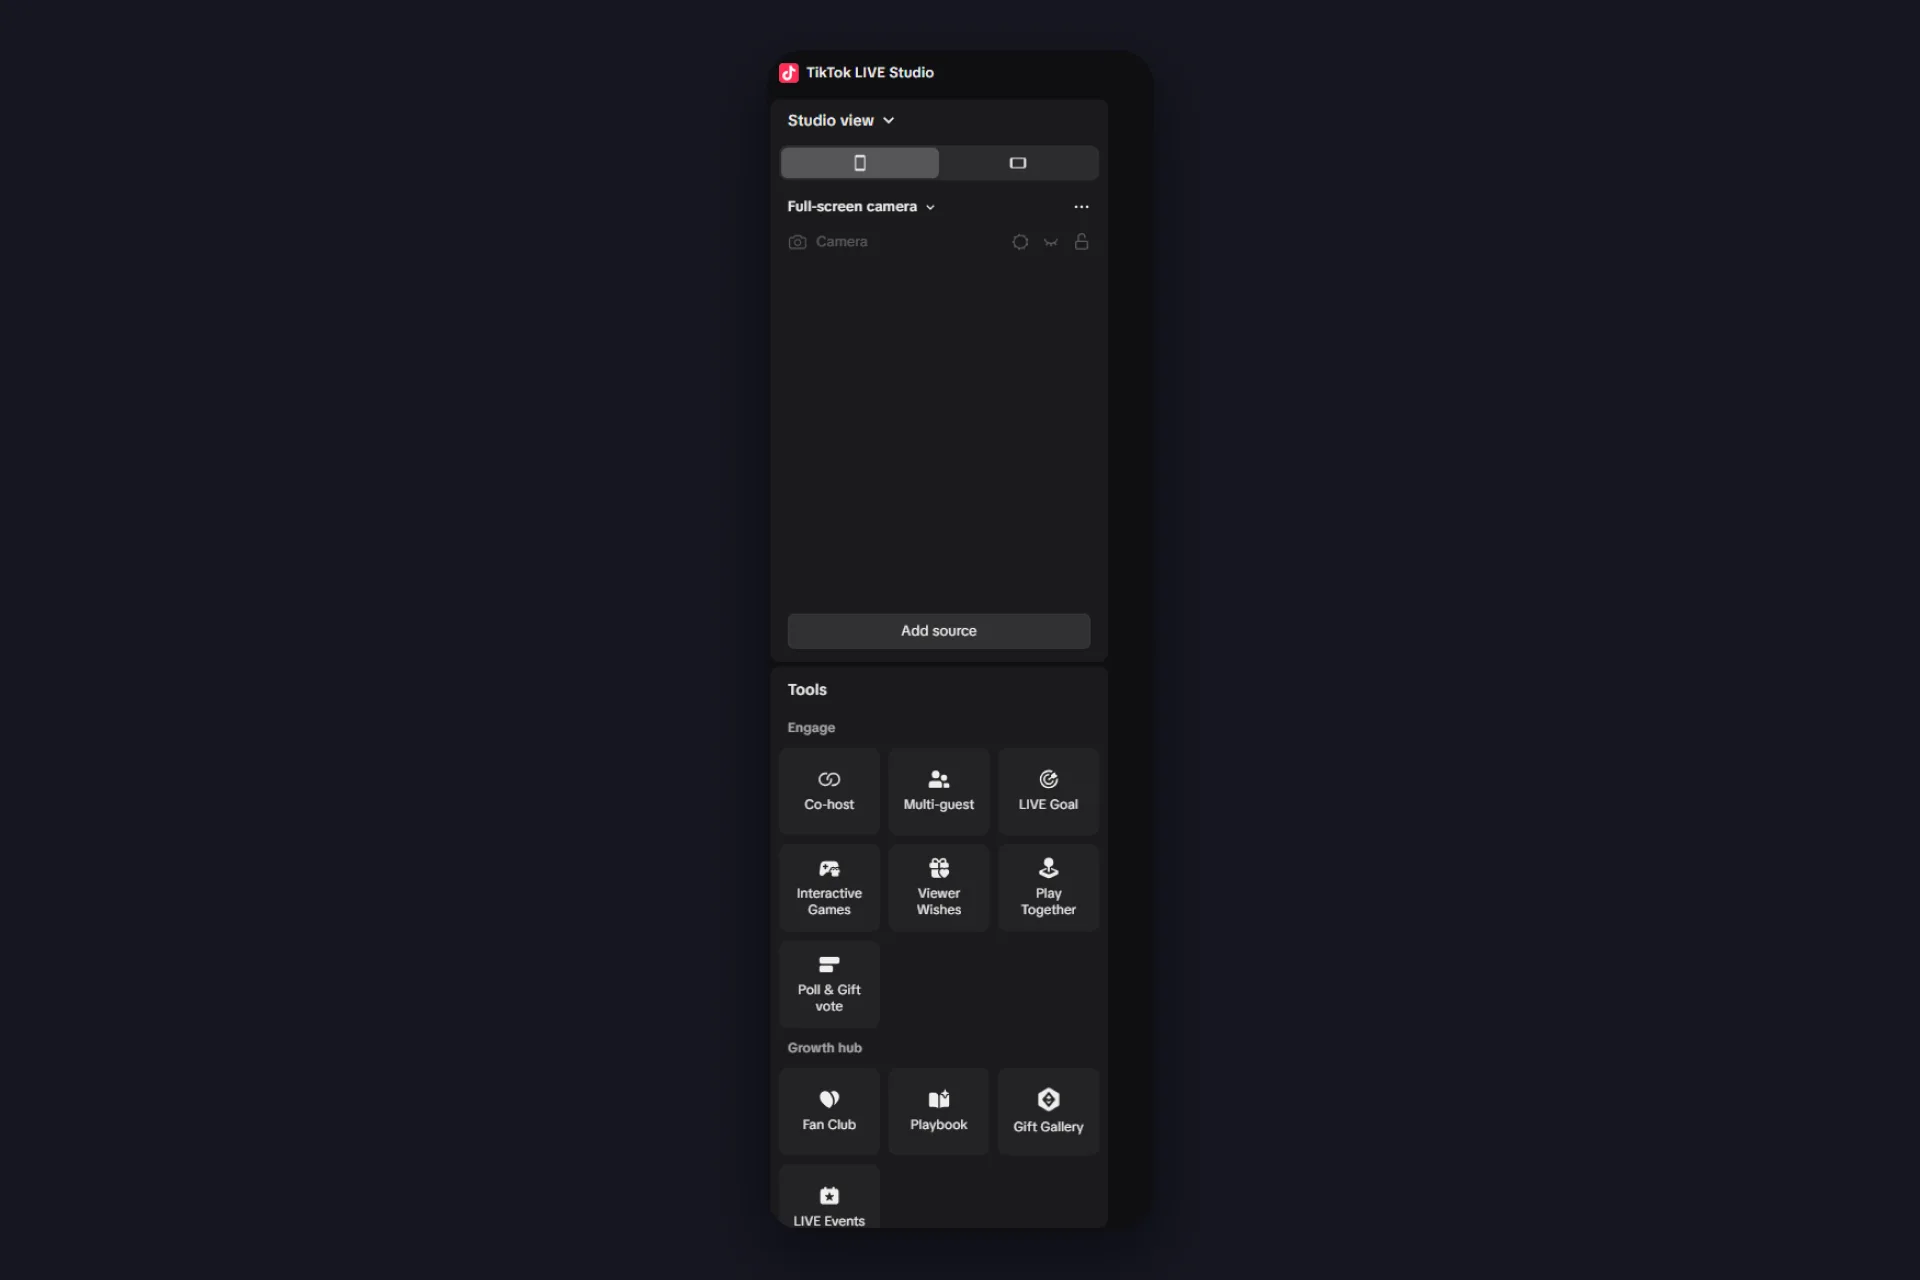
Once you’re comfortable, explore the Tools panel on the left. That’s where TikTok keeps the features you won’t find in a generic broadcasting tool: co-host and multi-guest for streaming with others, LIVE goals, interactive games, Play Together, and poll and gift votes. These run on TikTok’s side, so they work alongside whatever overlays you’ve added.
Two things to remember while you’re live:
- Most viewers watch in portrait on a phone. Keep text big, keep the action centered, and leave the bottom of the frame uncluttered, TikTok’s own interface sits there for your viewers.
- Chat doesn’t moderate itself. Set keyword filters in your LIVE settings and give a trusted viewer moderator rights, so you can stay focused on the content.
After the stream, check your stats: watch time, new followers, gifts. That tells you what to double down on next time.
Power move: bring your OBS scenes into LIVE Studio
Here’s a trick for creators who already have a polished OBS setup: LIVE Studio can use the OBS Virtual Camera as its camera source. Start the virtual camera in OBS, pick it as your camera in LIVE Studio, and your whole OBS scene, overlays and all, streams through LIVE Studio. The neat part: OBS never connects to TikTok in this setup, LIVE Studio does the streaming. So you don’t need a stream key for it, which normally locks OBS streaming behind its own access hurdle.
There’s a catch, and it surprises almost everyone: LIVE Studio locks a handful of features for new accounts, and virtual cameras are one of them. Display capture and cast start out gated the same way. The unlock condition: stream from LIVE Studio a few times for 25 minutes or longer (the tooltip on the greyed source counts down how many you have left). Mobile streams don’t count toward this, and the validation can take up to 48 hours after the qualifying stream. So plan a few regular streams first, the unlocks follow.
When something’s off: quick troubleshooting
Most LIVE Studio problems fall into a handful of buckets, and most of them have a two-minute fix:
- Laggy preview or UI: your system is overloaded. Close background apps, cut the number of sources, and drop the stream from 1080p to 720p. The speed test built into the app knows which resolution your setup can handle, trust it.
- “Frame drops” counter climbing while you’re live: that’s your network, not your PC. Stop downloads and updates in the background, or set a lower bitrate for your stream.
- No sound or the wrong mic: open the Audio mixer (lower edge of the center panel) and check which device is selected and how loud it’s set. There’s also a noise suppression toggle in the mic settings, worth enabling if your fan hums along.
- Crashes or the app won’t open: restart your computer first, then reinstall LIVE Studio into the same folder. Installing to the original location keeps your scenes and settings.
For everything beyond that, firewall exceptions, driver checks, capture card quirks, TikTok’s official LIVE Studio troubleshooting guide goes deep on all of it.
LIVE Studio or another broadcasting tool?
Short version: LIVE Studio is the easy path, OBS is the flexible one. Both run on Windows and Mac, and both work with TikFinity widgets, in OBS you add them as browser sources instead of link sources.
🎯 TikTok LIVE Studio
|
🔧 OBS Studio
|
If you’re just starting on PC, try LIVE Studio first. For the full tool comparison, including OBS, Streamlabs, and the other desktop routes, read our guide on streaming to TikTok from a desktop. And if OBS sounds like your route, the OBS setup guide walks you through it.
Your desktop stream, ready in an afternoon
The short version of this TikTok LIVE Studio tutorial: download LIVE Studio, log in, run the wizard, build your sandwich, and drop in a TikFinity alert via link source. That’s a complete TikTok LIVE Studio setup in one afternoon, professional look included, without spending anything.
And here’s the best part: while other streamers are still fighting their settings, you’ll be the one whose stream pops with every gift, celebrates every new follower, and looks like it took a production team. It took you one afternoon. Alerts, goals, TTS, and more are waiting at TikFinity, free, and connected with nothing but your @username.
Set up your stream with TikFinity, free →
FAQs about TikTok LIVE Studio
TikTok’s official broadcasting app for Windows. It streams your camera, screen, or game directly to TikTok LIVE, with chat and stream settings built in. Not to be confused with TikTok Studio, the creator dashboard for videos.
Yes. It’s an official TikTok app and costs nothing. Download it from TikTok’s website, not from third-party portals.
Yes. TikTok ships macOS versions alongside Windows, one build for Apple Silicon and one for Intel Macs. Pick the right one on the official download page.
You need LIVE access on your account, and the common threshold for that is 1,000 followers. Without access, LIVE Studio won’t let you start a stream. Our guide on how many followers you need to go LIVE has the full picture, and if the LIVE option still won’t show up, check why you can’t go live on TikTok.
Yes. Add any TikFinity widget as a link source: copy the widget URL from TikFinity, paste it into a new link source, and position it in your scene.
Widgets activate once they’re embedded and your LIVE is running. Also double-check that you connected TikFinity with your @username, not your display name.
Virtual cameras are locked for new LIVE Studio accounts. They unlock once you’ve done three streams of 25 minutes or longer from LIVE Studio. Mobile streams don’t count, and validation can take up to 48 hours.
Add TikFinity via a link source: free alerts, goals, and TTS that react to gifts, follows, and chat in real time. It takes minutes to set up, needs just your @username, and works in LIVE Studio and OBS alike.
Click the greyed entry and the app tells you the exact reason: the source isn’t supported in your scene layout, it clashes with a widget already on the scene (a countdown blocks ranking stickers, for example), it’s limited to one per scene, or it still needs unlocking through LIVE Studio streams of 25 minutes or more.
Yes. Open LIVE info at the top of the app and you can update your title, topic, cover, and about me even while you’re live. Still, set them before you start, they decide who TikTok shows your stream to from minute one.